This blog will explain to you the NGINX timeouts, along with the procedure to install NGINX and disable its timeouts in Ubuntu.
Before diving into the procedure of NGINX installation and disabling its timeouts, let’s understand NGINX timeouts.
What is NGINX?
NGINX (Pronounced as “Engine X”) is an open-source powerful HTTP web server that even acts as a reverse proxy server and IMAP/POP3 proxy server.
It is popular because of its features like high performance, easy configuration, stability, flexibility, and minimal resource usage. It serves the purpose of a load balancer when used as a reverse proxy and is placed between multiple servers.
NGINX utilizes an asynchronous, event-driven architecture instead of depending on threads to handle requests. It even offers a commercial version known as “NGINX Plus”. It powers many popular websites including Pinterest, Netflix, Heroku, Airbnb, and many more.
What are NGINX Timeouts?
NGINX Timeout refers to the duration after which the particular process is terminated. Defining an appropriate timeout aids the user to ensure that any request doesn’t hold connections or resources indefinitely, which improves the performance.
Timeouts are set in seconds generally, however, you can utilize other NGINX time units, such as ms (milliseconds), s (seconds), m (minutes), and more.
Different Types of NGINX Timeouts
Let’s look at some common types of Timeouts which can be configured.
- Client Body Timeout – It is the duration to read the client’s request body, and it can be set using the syntax
“client_body_timeout <time_unit>;”. The default time is 60 seconds. - Client Header Timeout – It is the duration for reading the client’s request header, which can be set by utilizing the syntax
“client_header_timeout <time_unit>;”. Its default duration is 60 seconds. - Keepalive Timeout – It refers to the duration a connection can remain open/alive if no new requests are made. The default time for keepalive timeout is 75 seconds, which can be set by using the syntax
“keepalive_timeout <time_unit>;”. - Send Timeout – It determines the duration NGINX will wait for the complete request header to be sent by the client. The default time is 60 seconds, which can be set using the syntax
“send_timeout <time_unit>;”. - Proxy Read Timeout – It refers to the maximum duration NGINX will wait for a response from the backend server when acting as a reverse proxy. It can be configured using the syntax
“proxy_read_timeout <time_unit>;”. - Proxy Connect Timeout – It is the maximum duration NGINX will wait for a connection to be established with the backend server. It is set using the syntax “proxy_connect_timeout <time_unit>;”.
Why Do We Disable NGINX Timeouts?
Permanently disabling the NGINX Timeouts is not recommended as timeouts aid in improving the performance of the server by terminating the processes after a specified time to save resource consumption.
However, there are some exceptional cases, such as testing or specialized use cases, where temporarily disabling timeouts are useful for extended connection or processing times.
Before disabling the NGINX timeout, it is necessary to know how to install NGINX. If you already know that, or you already have Nginx installed, you can skip this part.
Install NGINX in Ubuntu
To install NGINX in Ubuntu, open the terminal and run the apt command to ensure that your system’s local repository cache refreshes.
$ sudo apt update
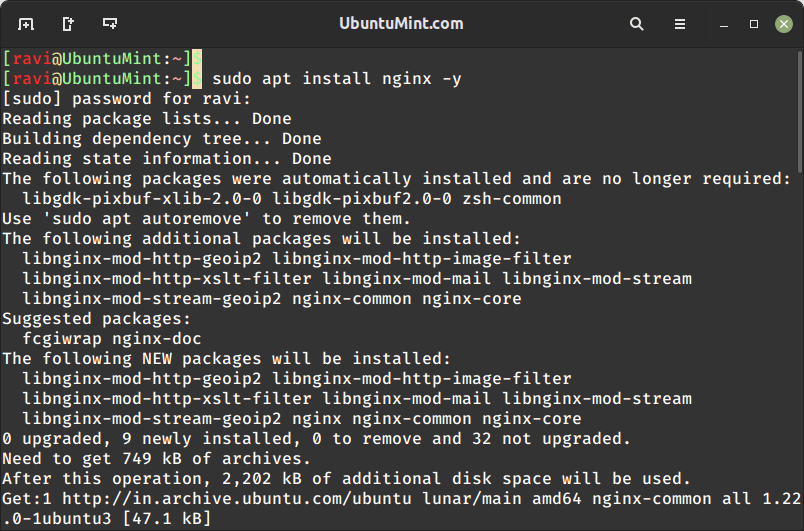
After updating your system, execute the command stated below to install NGINX from Ubuntu’s Official repository.
$ sudo apt install nginx -y
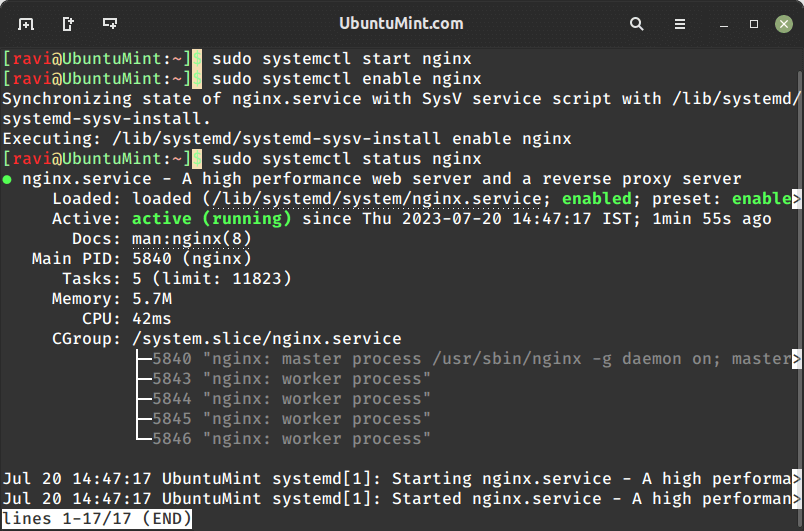
Once NGINX is installed in your system, you can start, enable and verify the state of its service by using the systemctl commands.
$ sudo systemctl start nginx
$ sudo systemctl enable nginx
$ sudo systemctl status nginx
How to Disable NGINX Timeout?
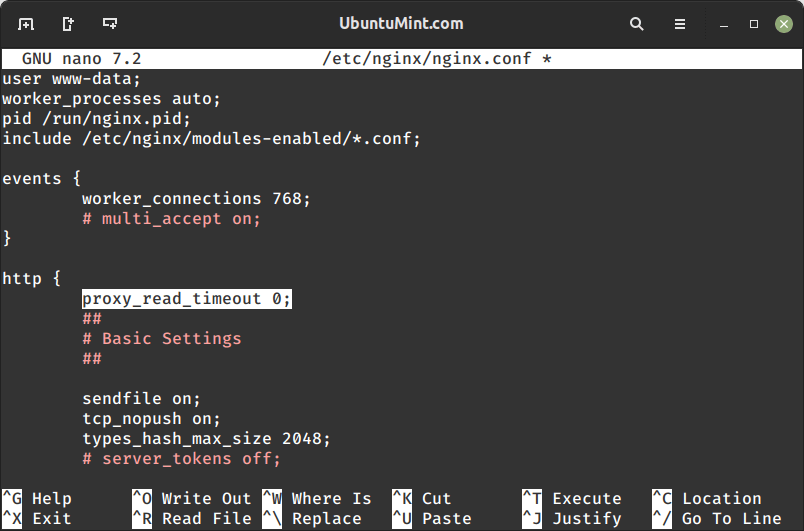
To disable the NGINX Timeouts, you can either modify the NGINX configuration file or create a new file for it. In this blog, we will modify the configuration file by opening it with the nano editor.
$ sudo nano /etc/nginx/nginx.conf
In the configuration, disable the desired timeout by setting its time unit to 0. Here, we will disable the “Proxy Read Timeout” by adding the line given below in the “nginx.conf” file.
proxy_read_timeout 0;
Save and exit the NGINX configuration file.
After modifying the file, let’s restart the NGINX server service.
$ sudo systemctl restart nginx
OR
$ nginx -s reload
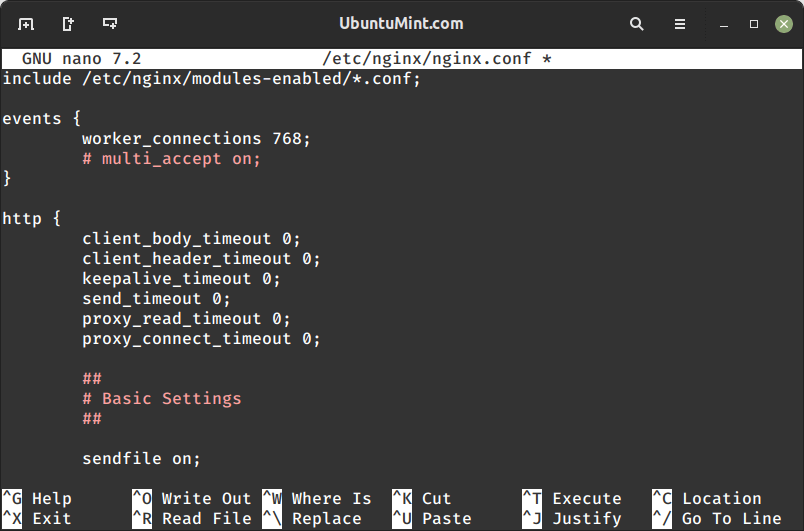
We disabled one timeout successfully. However, we can disable multiple timeouts by setting their values to “0” in the “nginx.conf” file.
http {
    # ... other configurations ...

    client_body_timeout 0;
    client_header_timeout 0;
    keepalive_timeout 0;
    send_timeout 0;
    proxy_read_timeout 0;
    proxy_connect_timeout 0;

    # ... other configurations ...
}
After making the changes, reload the NGINX configuration to apply the changes.
$ sudo service nginx reload
If you want to do any other configurations of NGINX, you can follow these related articles:
Conclusion
NGINX Timeouts are the time durations after which the specified process is terminated. Setting the value of these timeouts is essential to ensure that any request doesn’t hold resources indefinitely.
However, in some scenarios, such as testing, there may be a need to disable timeouts temporarily. This guide covered the procedure of installing NGINX and disabling its timeouts.