macOS takes credit for the original development of the Homebrew package manager. With this package manager, Linux users are able to effortlessly install free and open-source software packages from their command-line environment.
You might think that the various popular Linux OS distributions are already equipped with their own package managers such as APT, DNF, YUM, PACMAN, and ZYPPER.
These default package managers are indeed sufficient when retrieving and installing tools and programs from maintained and trusted package repositories. However, these package managers are not always the go-to solution for all practical scenarios.
Why Homebrew Package Manager?
For instance, to use programming languages like Python and Node.js on a Linux environment, you will need to consider the use of their accustomed package managers like pip3 (for Python3) and npm (for Node.js). These software-based package managers make the installation of additional and mandatory libraries and scripts possible.
In comparison to the Linux-based repository packages, the equivalent of most of these packages are better maintained under the Homebrew package manager. Also, Homebrew packages attribute the provision of a per-user functionality making sure that there is no conflict between it and your default package manager like APT, DNF, etc.
This tutorial guide will walk us through the installation and usage of the Homebrew package manager on Linux.
Homebrew Installation on Linux Systems
The Homebrew package manager’s homepage provides an official installation script that works for all Linux operating system distributions. The installation procedure is associated with a preferred Homebrew prefix.
For instance, the preferred prefix for this package manager under Linux is /home/linuxbrew/.linuxbrew. This prefix disregards the necessity of using sudo when running the Homebrew package manager installation command (brew install).
This Homebrew installation script is user-interactive such that we will have to confirm every critical installation step prior to its execution.
Step 1: Install Curl and Git Tools
If they are not already installed on your machine, consider the following installation instructions:
$ sudo apt install curl git       [On Debian, Ubuntu and Mint]
$ sudo yum install curl git       [On RHEL/CentOS/Fedora and Rocky Linux/AlmaLinux]
$ sudo pacman -S curl git         [On Arch Linux]
$ sudo zypper install curl git    [On OpenSUSE]
Step 2: Run Homebrew Installation Script
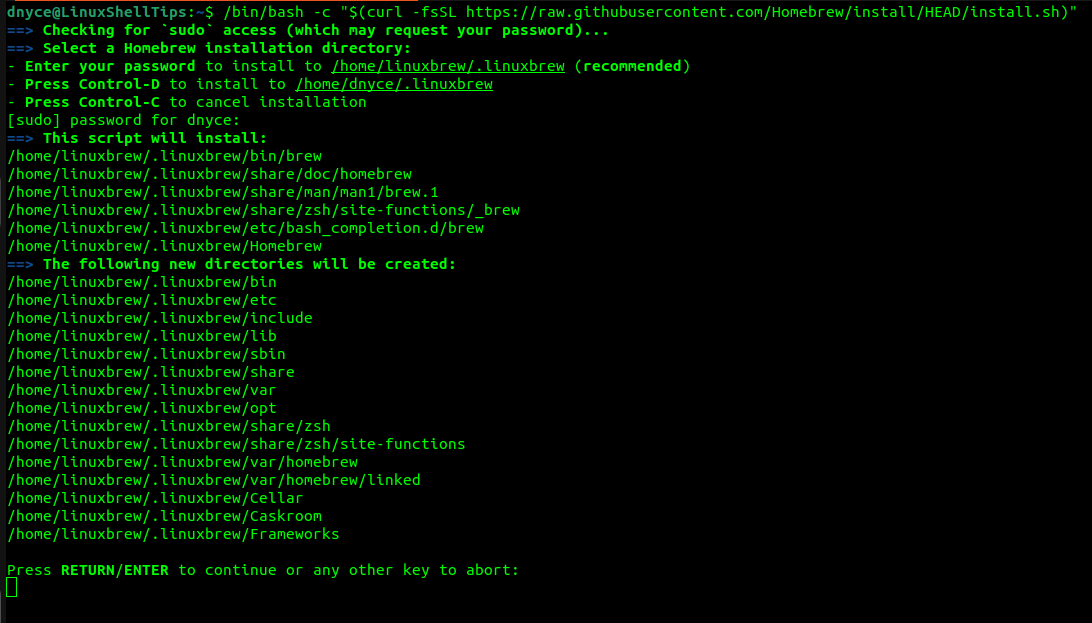
Next, run the following script using the curl command, running this script will first ask you for the Sudoer user password of the Linux system.
$ /bin/bash -c "$(curl -fsSL https://raw.githubusercontent.com/Homebrew/install/HEAD/install.sh)"

Afterward, press [Enter] to confirm and continue the installation of Homebrew, its other associated packages, and the creation of needed directory paths.
The installation process should then take some time to complete, therefore, take a coffee break if need be. Once installed, consider executing the commands as advised on the final screen capture of Homebrew installation:
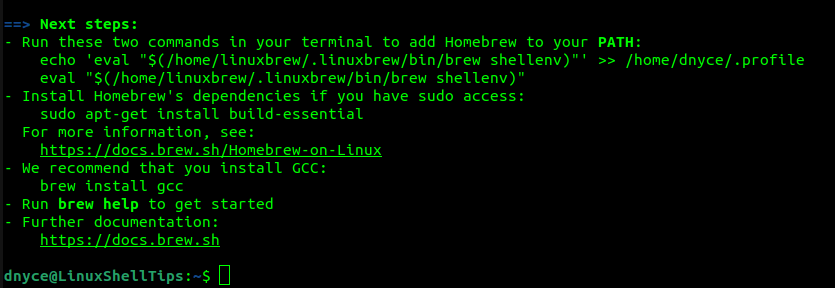
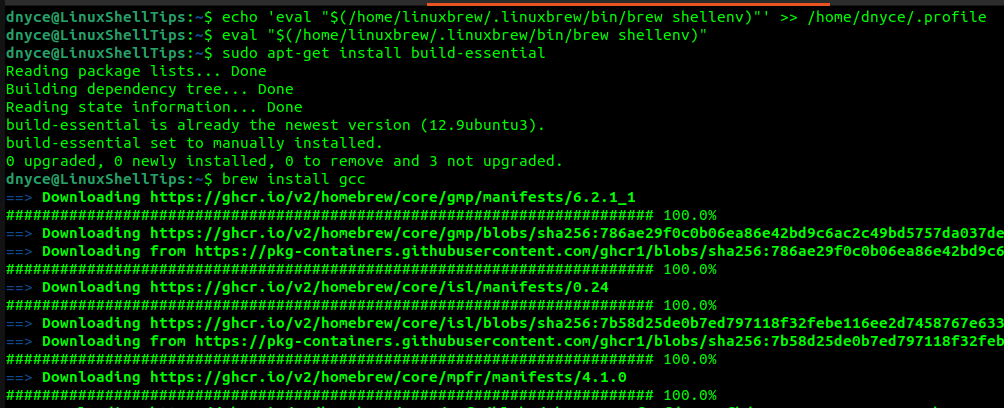
$ echo 'eval "$(/home/linuxbrew/.linuxbrew/bin/brew shellenv)"' >> /home/dnyce/.profile
$ eval "$(/home/linuxbrew/.linuxbrew/bin/brew shellenv)"
$ sudo apt-get install build-essential
$ brew install gcc
On my end, a summary of executing the commands on the above screen capture is as follows:
Homebrew Usage in Linux
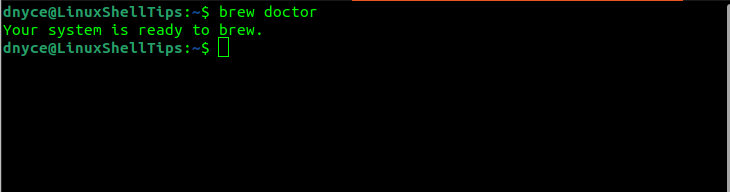
Open/start a new shell for this section. Verify that the installation of the Homebrew package manager is correctly done by running the command:
$ brew doctor
You should get an output similar to the following:
Let us for instance assume we are installing a Linux package called a tree.
$ brew search tree      [Search a Package]
$ brew install tree     [Install a Package]
$ brew upgrade tree     [Upgrade a Package]
$ brew uninstall tree   [Remove a Package]
For more usage and example, read our guide on the homebrew commands cheat sheet.
You are now familiar with the installation and usage of Homebrew on Linux. Your comments and feedback are always appreciated!