The XFCE Desktop environment is a fast, resource-friendly, and lightweight Desktop environment for Linux systems. It is the Desktop environment of choice for old systems or PCs with low computational power such as low RAM and CPU specs.
If you are running a sluggish Linux system with a GUI such as GNOME or KDE, switching to the XFCE environment is highly recommended to improve performance.
In this guide, we will demonstrate how to install the XFCE Desktop environment on Alpine Linux.
Installing XFCE Desktop on Alpine Linux
First off, access the Alpine Linux terminal and update the local package index using the following apk command:
$ apk update
The next step is to install the Xorg server, which is a free and open-source X-11 Windows server for Linux systems. It provides an interface through which users can interact with the graphical elements of the system.
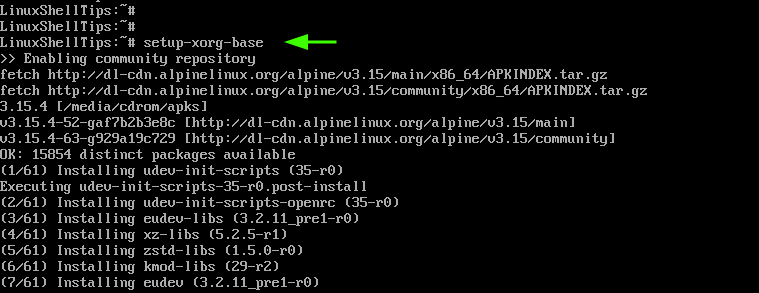
To install the Xorg server on Alpine, run the command:
$ setup-xorg-base
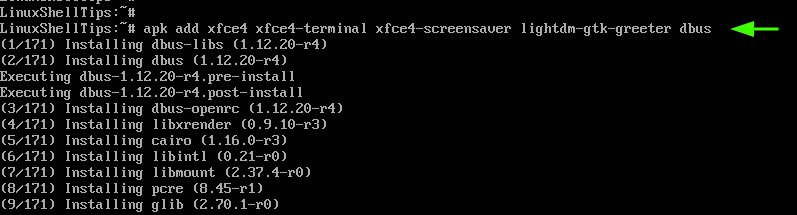
With the Xorg server already in place, proceed and install the XFCE environment, lightdm display manager, and dbus (Desktop bus) package as follows.
$ apk add xfce4 xfce4-terminal xfce4-screensaver lightdm-gtk-greeter dbus
The installation size is approximately 400MB and this might take a while.
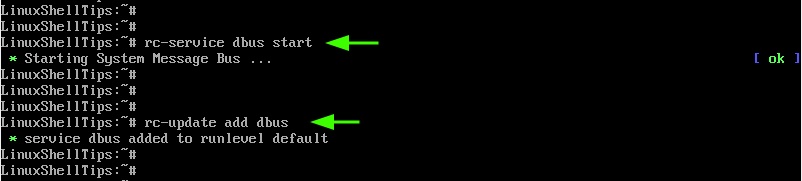
With all the components of the XFCE desktop environment and dbus installed, start the dbus service.
# rc-service dbus start
Just as crucial, consider enabling the dbus service to automatically start on boot.
# rc-update add dbus
The final step is to enable and start the Lightdm display manager, which is a fast and lightweight X display manager provided by the lightdm-gtk-greeter package.
To enable the display manager, run the command.
# rc-update add lightdm
Next, start the display manager by running the command:
# rc-service lightdm start
Right after running the command, a login screen will appear. Provide your credentials and log in.
Once logged in, the XFCE desktop environment will come into view. From there you can enjoy using the graphical interface to navigate your system and explore various tools and applications that come with XFCE.

And there you have it. We have successfully installed the XFCE desktop environment on Alpine Linux.