Wondering how to block and unblock an IP Address using the UFW firewall in your Ubuntu server to ensure system security by managing incoming and outgoing network traffic? If yes, then stick to this super easy and comprehensive guide, which will offer a solution to block and unblock IP addresses using UFW.
But before diving into the solution, there are a few important concepts that you need to understand, such as what is UFW and what it essentially does.
What is UFW and How Does It Work?
UFW (an acronym for Uncomplicated Firewall) is like a guardian for your Ubuntu server’s security, which simplifies the process of managing your server’s firewall, making it a breeze to block or unblock specific IP addresses.
Behind the scenes, UFW acts as a front-end interface for iptables, which is the built-in firewall management system utility in all major Linux distributions.
Think of it as a translator that takes your commands and talks to the firewall on your behalf. This way, you can secure your server and regulate network traffic without breaking a sweat.
After understanding UFW, let’s proceed with the installation and setup process.
Note: This part is not compulsory, as UFW is mostly installed by default on Debian-based distribution servers, but it is not enabled by default. So, if UFW is already installed and enabled, you can skip this part.
Install UFW in Ubuntu
To install the UFW, simply use the following apt command stated below.
$ sudo apt install ufw -y

After the successful installation of UFW, you can enable it by executing the command provided below.
$ sudo ufw enable

Firewall is active and enabled on system startup
It’s a good practice to confirm the status of the UFW service after enabling it, and that can be done by running the following command.
$ sudo ufw status

Status: active
After the installation and setup process of UFW. It’s time to discuss the reason why we block or unblock an IP Address.
Why Do We Block and Unblock an IP Address?
We block and unblock specific IP addresses to enhance network security and manage access control. If you find any malicious IP address, it is beneficial to block that IP address so that any incoming request from that particular IP is ignored/blocked by the firewall.
Additionally, if you block an IP address accidentally, UFW offers the facility of unblocking an IP address to rectify the mistake and restore access for legitimate users or services.
Let’s move to the procedure of blocking and unblocking an IP Address by utilizing UFW.
How to Block IP Address in Ubuntu UFW Firewall
To block all incoming traffic from the specified IP address using the Uncomplicated Firewall (UFW) in Ubuntu, use the following deny command followed by the IP address you want to block.
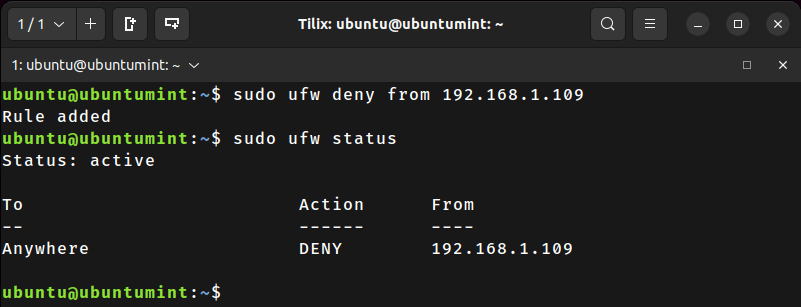
For example, to block the IP address 192.168.1.109, run the following command:
$ sudo ufw deny from 192.168.1.109
The above command will block all kinds of traffic from “192.168.1.109”, but keep in mind that UFW rules are applied in order, so if you have any other rules allowing traffic from the same IP before this deny rule, they will take precedence.
To ensure the deny rule’s effectiveness, you must place it ahead of any allowed rules for the same IP address by using.
$ sudo ufw status numbered
The above command will display the rule numbers and adjust their order if needed by using.
$ sudo ufw insert <number> deny from <IP_Address>
After denying an IP Address you can check the status of UFW by executing the given command.
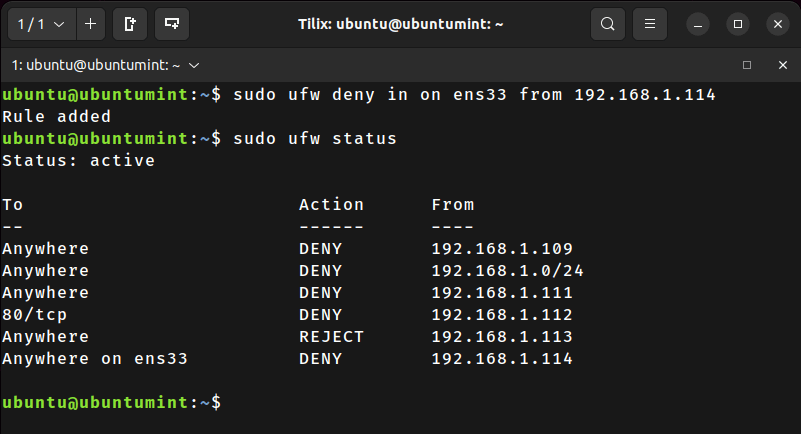
$ sudo ufw status
The output will display information about the current configuration of UFW and which IP addresses or ports are allowed or denied access.
To block or deny all packets from a specific IP, just use the “to any” at the end of the command as stated below.
$ sudo ufw deny from 192.168.1.109 to any
How to Block Specific IP Range in Ubuntu UFW Firewall
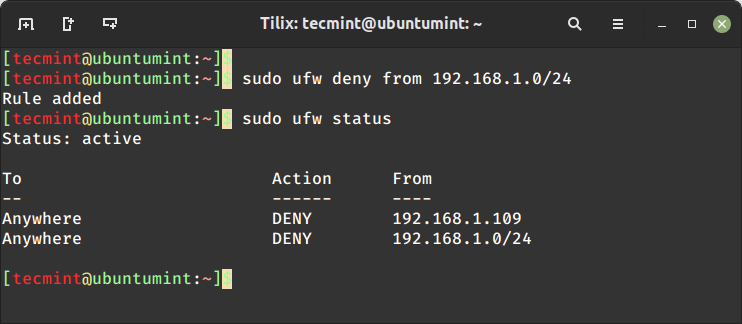
To block a subnet of IP addresses using the Uncomplicated Firewall (UFW) in Ubuntu, you can specify the subnet using CIDR (Classless Inter-Domain Routing) notation, which allows you to define a range of IP addresses by specifying the network address and the number of bits in the subnet mask.
$ sudo ufw deny from 192.168.1.0/24
To check the current status of UFW and see if the rule is added successfully, use the following command:
$ sudo ufw status
How to Block IP Address to a Port in UFW
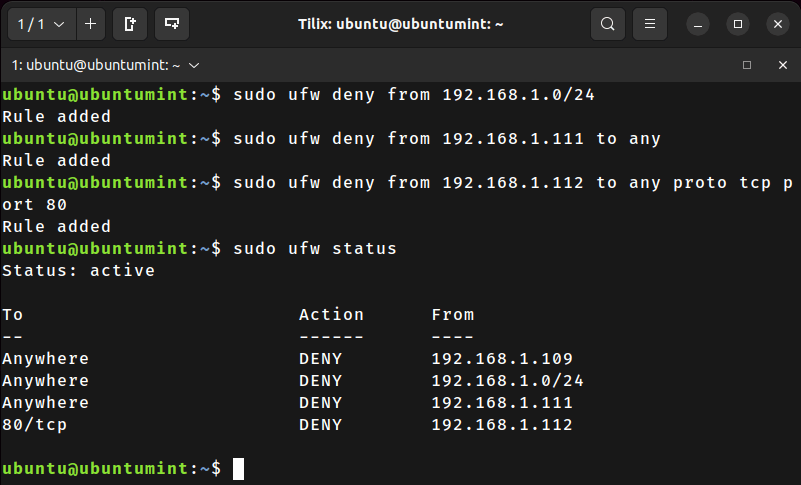
By using the port <port_number> at the end of the UFW deny command, you can block traffic coming from an IP address on a specific port. Let’s execute this command to block traffic from the “192.168.1.112” IP Address on the port “80”.
$ sudo ufw deny from 192.168.1.112 to any proto tcp port 80
After blocking the traffic from an IP on a port, it is recommended to confirm the UFW status.
$ sudo ufw status
How to Reject IP Address in UFW
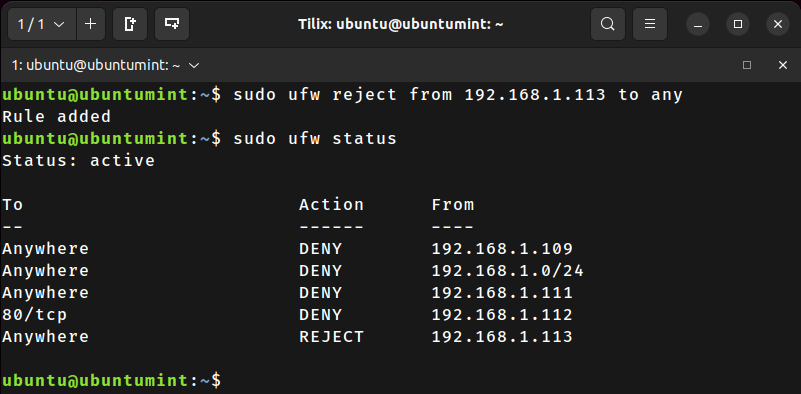
Instead of denying an IP, we can reject the connection from any IP. Basically, in UFW, “deny” silently drops blocked traffic without responding to the source IP, potentially causing timeouts or confusion.
On the other hand, “reject” sends a clear rejection response back to the source IP, making it aware of the denial and allowing for faster recognition of the blocked connection.
So to reject an IP address, you simply need to use the “reject” keyword in place of “deny” as shown in the following command:
$ sudo ufw reject from 192.168.1.113 to any
$ sudo ufw status
How to Block IP Address to Interface in UFW
To block incoming traffic originating from the IP address “192.168.1.114” on the specified network interface (“en33”), use the following command:
$ sudo ufw deny in on ens33 from 192.168.1.114
$ sudo ufw status
Here, you can also reject it, instead of denying it.
How to Unblock IP Address in UFW Firewall
Unblocking an IP address means removing an IP address that is already on the block list, allowing it to regain access. To unblock an IP address, simply delete the specified rule from the list.
$ sudo ufw delete deny from 192.168.1.111
Note: Be careful about the action specified for that rule when you are deleting it to confirm whether it is a reject or deny. In case of reject, replace the “deny” keyword with “reject”.
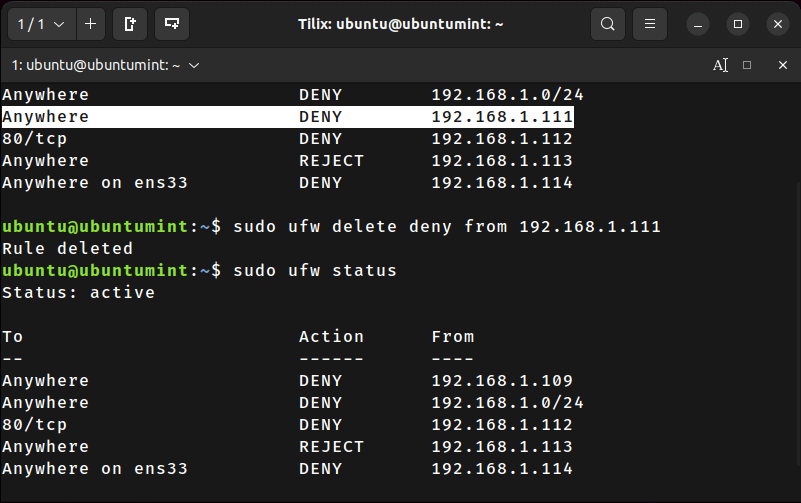
The screenshot showed that the specific rule or IP address has been deleted/unblocked.
How to Unblock IP Address Using Rule Number in UFW
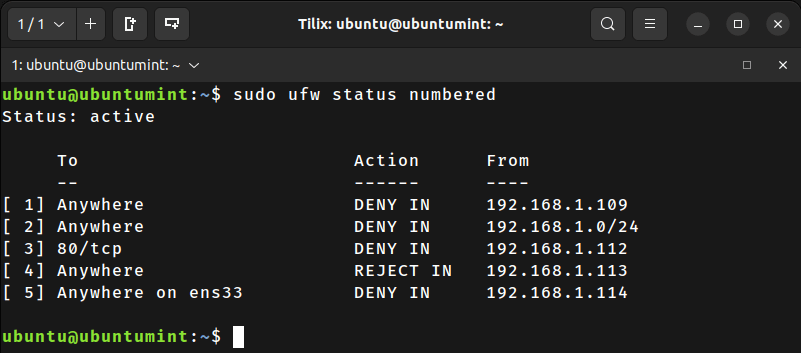
When we add (Blocking an IP) a rule using UFW, a unique number is assigned to that rule. To unblock an IP address using the associated rule number, you must first determine the associated rule number by typing the following command:
$ sudo ufw status numbered
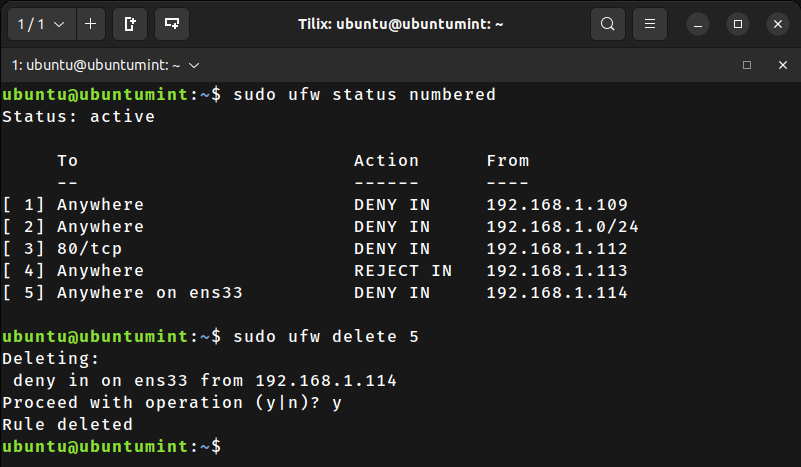
After confirming the rule number of an IP address that you want to unblock, use the “delete” command with the specific rule number as stated below:
$ sudo ufw delete 5
This command will ask you for the confirmation so type “y” and hit enter.
How to Unblock Rejected IP Address in UFW
To unblock a rejected IP address, you just need to place the “reject” keyword after the “ufw delete” command as demonstrated in the example below:
$ sudo ufw delete reject from 192.168.1.113
$ sudo ufw status
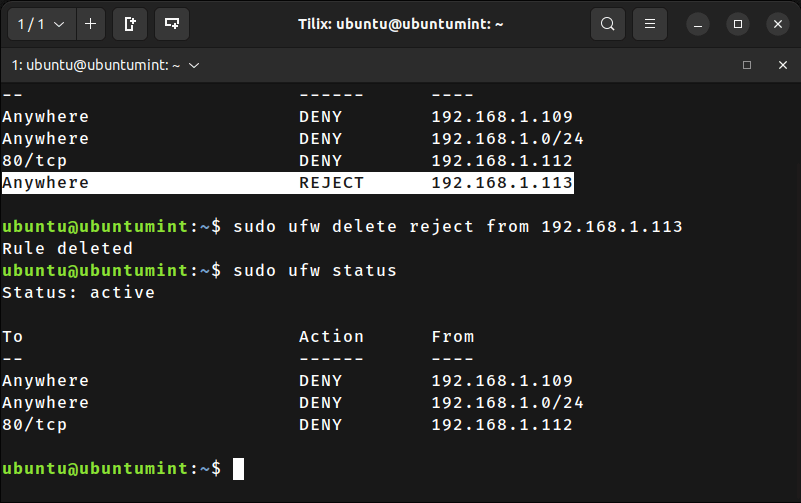
That’s how we can unblock the IP address using UFW. However, in a few cases, some IPs may be blocked by default and they may not be listed in the rules. To unblock such IPs, the solution is to explicitly allow them.
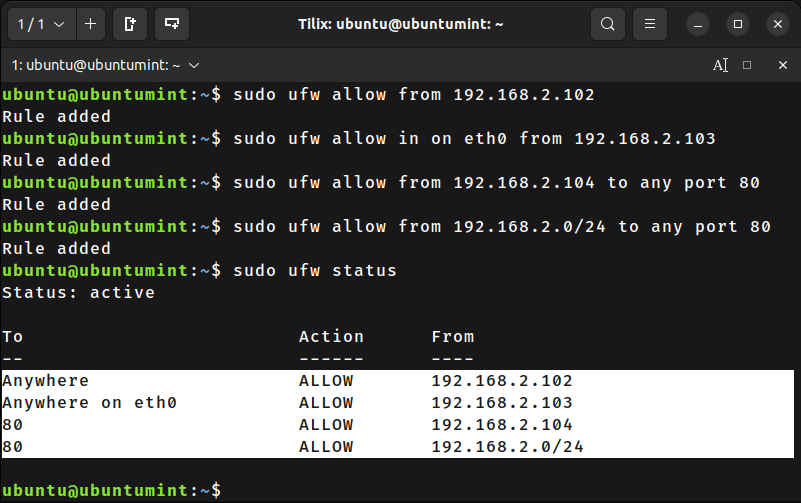
How to Allow an IP Address Using UFW
The IP address can be allowed by using the “ufw allow” command. Let’s try to allow traffic from the IP “192.168.2.102” by executing this command:
$ sudo ufw allow from 192.168.2.102
Note: Allowing incoming connections to a network interface, a specific port, or from a subnet of specific IP addresses follows the same process as blocking them, which means instead of using “deny”, you use “allow” to permit the desired traffic.
$ sudo ufw allow in on eth0 from 192.168.2.103
$ sudo ufw allow from 192.168.2.104 to any port 80
$ sudo ufw allow from 192.168.2.0/24 to any port 80
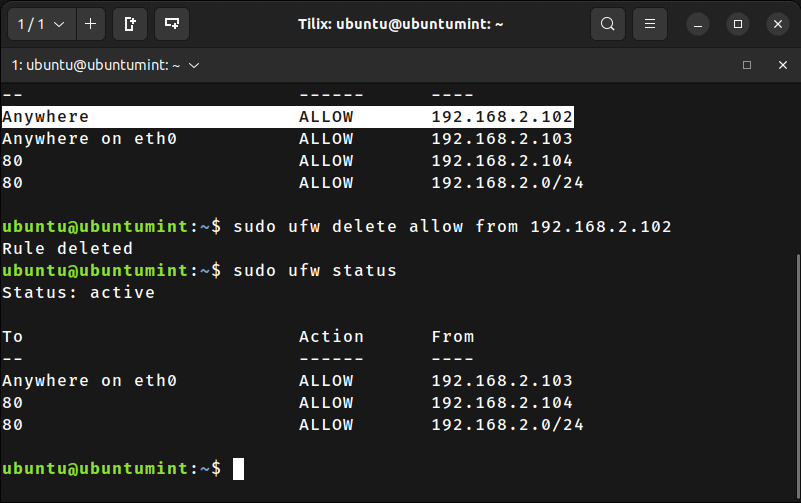
Also, suppose you want to block or remove the IP address that you have just allowed to make a connection. To block or remove such IP addresses, you simply need to use the “ufw delete allow” command.
$ sudo ufw delete allow from 192.168.2.102
To enable or disable the Uncomplicated Firewall (UFW) on Ubuntu, you can use the following commands:
$ sudo ufw enable
$ sudo ufw disable
So that’s it for now! You can easily secure your network using ufw firewall.
Conclusion
UFW is a powerful firewall management system utility that can manage incoming and outgoing traffic, block unwanted IP addresses, and allow trusted connections.
By carefully managing your UFW rules, you can ensure the security of your network. This guide demonstrates the process of blocking, unblocking, and allowing IP addresses in Debian-based distributions.