OpenLiteSpeed has become a top-rated open-source web server utility developed by LiteSpeed technologies. With its web-based control panel, you can host and manage websites, web applications, APIs, and other microservice-based applications. Moreover, you can also use it to build content delivery networks and media streaming web servers.
OpenLiteSpeed’s increasing popularity is due to its features, such as high performance, robust security, event-driven architecture, easy-to-use UI, and more. However, many users face various difficulties during its installation and need help.
In this tutorial, we’ll walk you through the step-by-step process of installing the OpenLiteSpeed web server on Ubuntu 22.04, the latest Long-Term Support (LTS) release.
Installing OpenLiteSpeed Web Server on Ubuntu
Installing OpenLiteSpeed is a straightforward process, and you can simply do it by going through the following steps.
Step 1: Install OpenLiteSpeed in Ubuntu
Before you start the installation process, ensure that the system is up-to-date by running the following apt commands.
sudo apt update -y
sudo apt upgrade -y
Next, you must enable LiteSpeed‘s repository, which consists of package information of OpenLiteSpeed and a few other utilities like LSPHP (LiteSpeed PHP).
sudo wget -O - https://repo.litespeed.sh | sudo bash
The above wget command retrieves the shell script from LiteSpeed’s server. By pipelining it to sudo bash, you ensure the script runs separately in a new shell and the repository gets set up successfully.
The last step before installing OpenLiteSpeed is to update the apt package list, which is essential to avoid receiving any unintended package or dependency errors during the installation.
sudo apt update
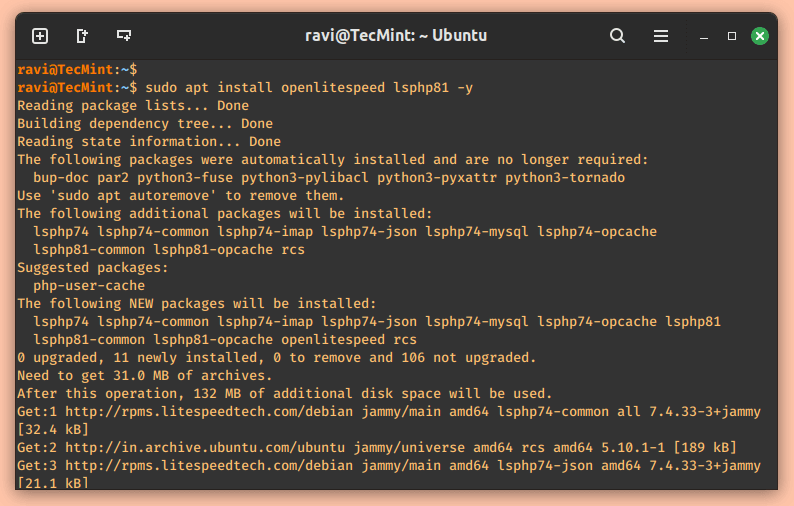
Now, you can proceed to install the OpenLiteSpeed web server by using the following command.
sudo apt install openlitespeed lsphp81 -y
Step 2: Configure OpenLiteSpeed Admin Password
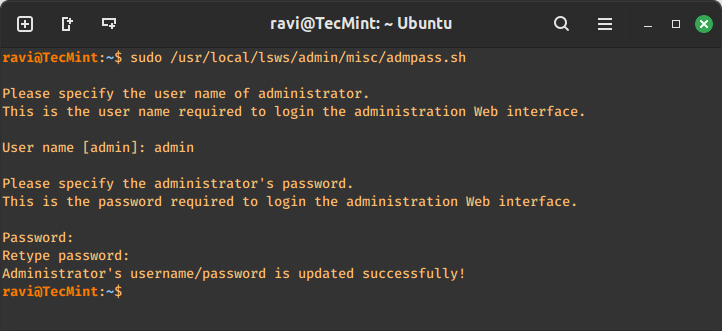
As the OpenLiteSpeed web server is now installed on your system, you need to set an administrative password to use it. The following command will run the script that OpenLiteSpeed provides solely to configure the admin’s credentials.
sudo /usr/local/lsws/admin/misc/admpass.sh
Upon execution, it will prompt you three times for these details: admin’s username, password, and password confirmation. For a username, you can either create one of your choice or press Enter without typing in any details, which will, by default, set the username to ‘admin‘.
After that, create a new password with a minimum of 6 characters (it does not allow a password below that length). Finally, when you confirm the password and press Enter, it should display: “Administrator’s username/password is updated successfully“.
Step 3: Start OpenLiteSpeed Service
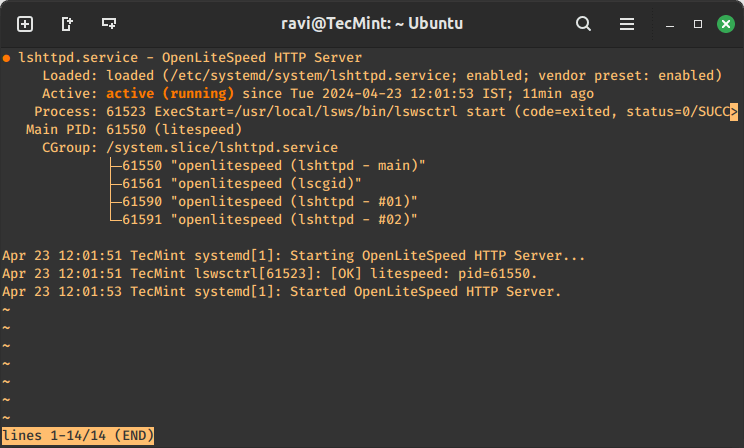
OpenLiteSpeed initiates the server right after installation. However, it’s a good practice to verify that it is actively used.
sudo systemctl status lsws
The output of this command should show the status as active (running), as shown in the image below.
Otherwise, you can start the OpenLiteSpeed service by running the following command.
sudo systemctl start lsws
Moreover, if the loaded status suggests that the service is disabled, enable it by running.
sudo systemctl enable lsws
Step 4: Access OpenLiteSpeed WebAdmin
As the OpenLiteSpeed server is ready to use, you must allow some ports through the firewall to access its admin console on the browser.
sudo ufw allow 7080,8088,443,80/tcp
Here’s a breakdown of the command:
- The 7080 port is often used for OpenLiteSpeed’s admin console.
- Many web applications require port 8088 to be open for incoming connections.
- The ports 443 (HTTPS) and 80 (HTTP) allow the OpenLiteSpeed server to cater to HTTP and HTTPS protocols.
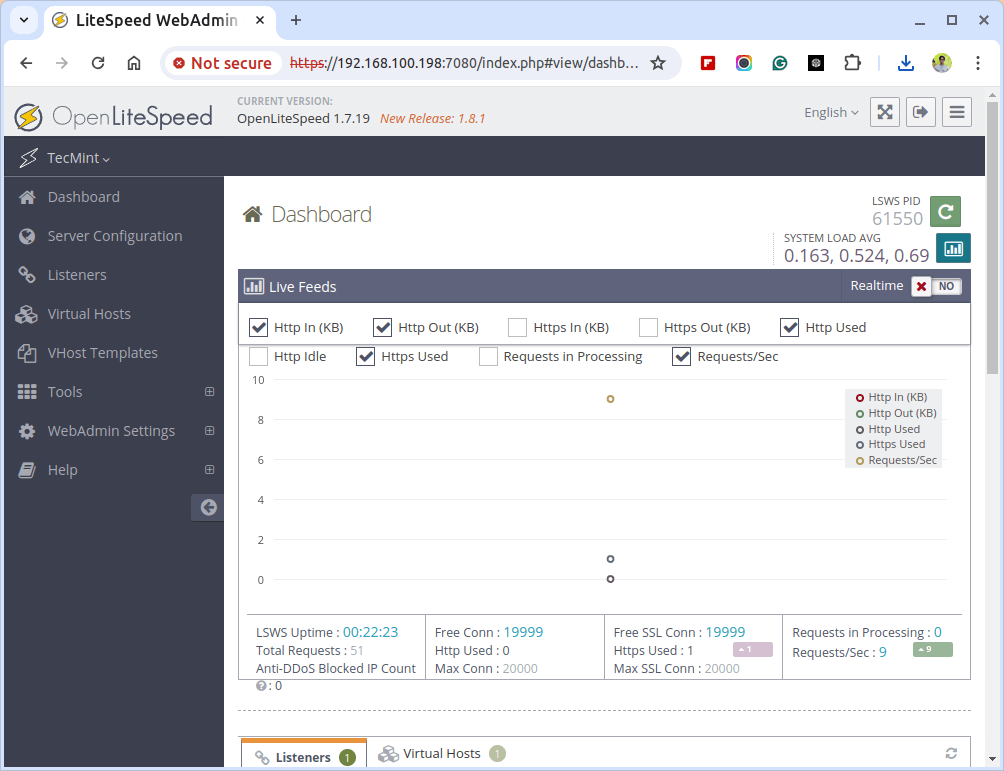
Now to access the WebAdmin interface, open your web browser and navigate to:
http://your-server-IP:7080
Replace your-server-IP with the IP address of your Ubuntu server. You should see the OpenLiteSpeed WebAdmin login page.

Type in the username and password you set up in the earlier step and click on Login to open the WebAdmin Dashboard as shown.
Step 5: Protect OpenLiteSpeed WebAdmin Access
One last thing you should do before unlocking OpenLiteSpeed’s true potential is to protect its WebAdmin console from unauthorized access.
To do so, you must take the following measures.
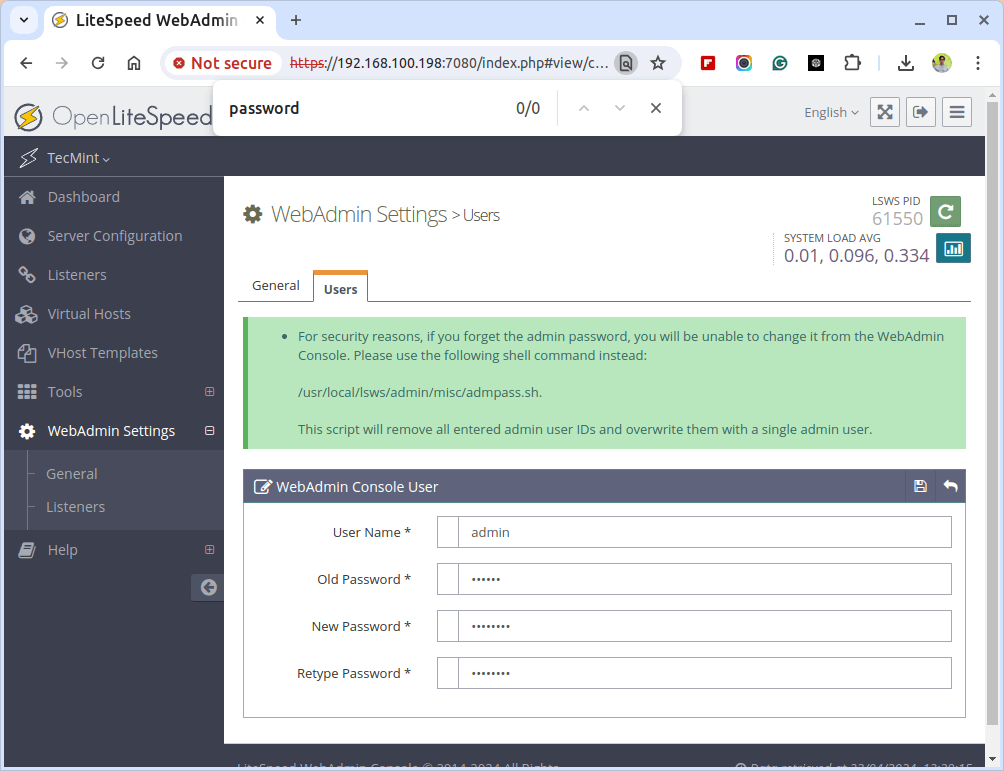
Change OpenLiteSpeed Admin Password
The default username and password for accessing the OpenLiteSpeed WebAdmin is not secure, therefore I recommend you set a strong and unique password with a combination of numbers, letters (upper and lower case), and special characters, such as I@m@OLSadmin123.
Navigate to the “WebAdmin Settings” tab, select “Users” from the left sidebar, enter your current password, and then set a new strong password.
Click on the “Save” button to apply the changes.
Restrict OpenLiteSpeed WebAdmin Access
Restricting access to the WebAdmin interface to specific IP addresses or networks adds an extra layer of security.
Navigate to the “Server Configuration” tab, select “Security” from the left sidebar, browse the ‘Access Control‘ section, and click the ‘Edit‘ button.
Under the ‘Allowed List‘ section, enter the desired IP address or IP range to allow them access to the WebAdmin console. For instance, 202.0.117.22 will add a single IP address to the allowed list, whereas 202.0.117.0/24 will allow access to an entire subnet.
Moreover, you can also add a specific IP address in the ‘Denied List‘ section to block it from accessing the WebAdmin interface.
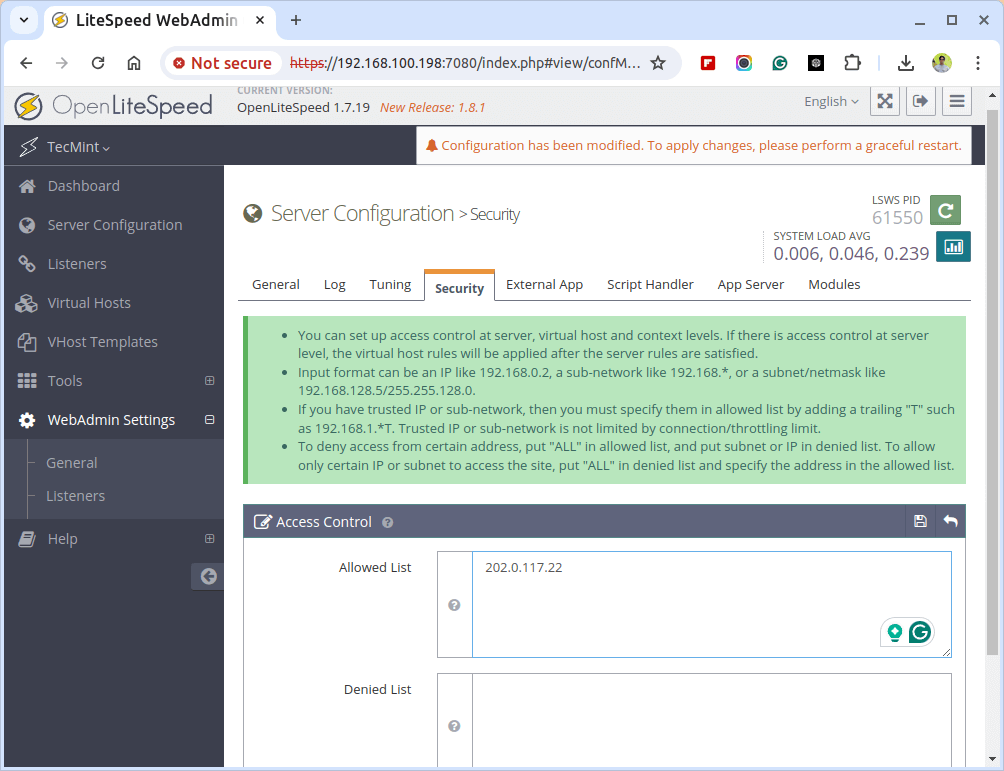
Click on the “Save” button to apply the changes.
Configure OpenLiteSpeed WebAdmin Access Logs
Regularly checking the WebAdmin access logs is a good practice to detect suspicious activity. These logs can tell you if someone has failed multiple login attempts or has been accessing the console at an unusual time.
Navigate to the “Server Configuration” tab, select “Log” from the left sidebar, and enable access logging for the WebAdmin interface by checking the appropriate boxes.
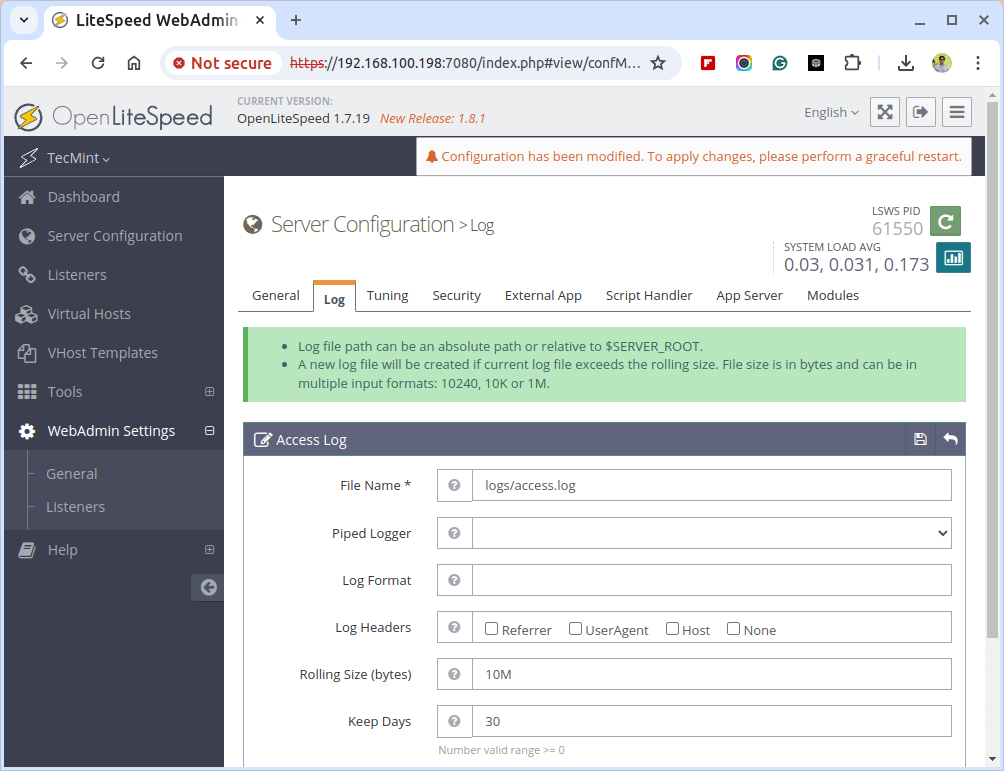
Click on the “Save” button to apply the changes.
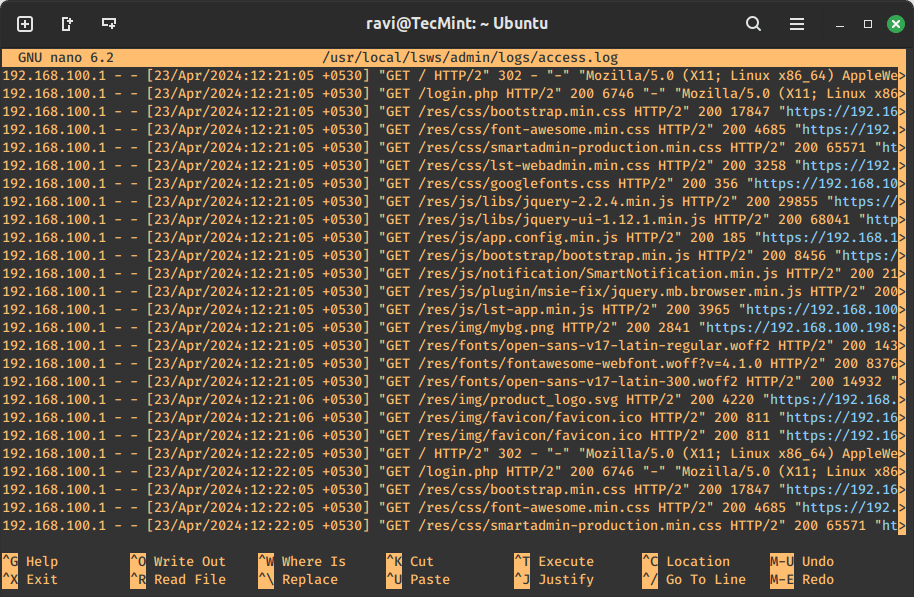
Generally, the access logs are located at /usr/local/lsws/admin/logs/access.log, which you can open with any text editor as shown.
sudo nano /usr/local/lsws/admin/logs/access.log
Change OpenLiteSpeed WebAdmin Port
By default, OpenLiteSpeed uses the 7080 port for its admin console, which anyone with even less knowledge can access. So, you must consider changing the port to protect the console from third-party interference.
Start by editing the admin_config configuration file with the following command.
sudo nano /usr/local/lsws/admin/conf/admin_config.conf
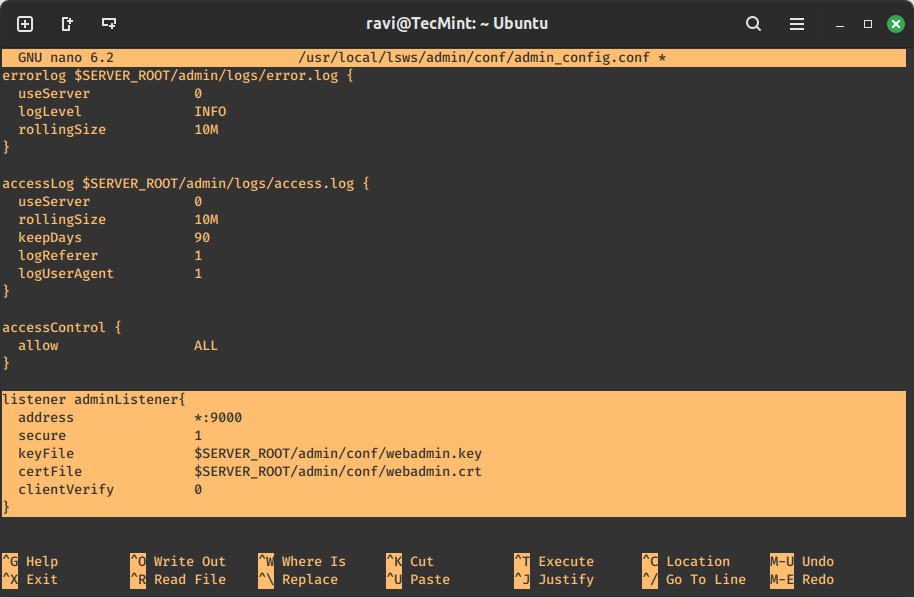
Locate the line that specifies the listener port and change the address field to any port number you desire. To demonstrate as an example, we have changed it to 9000.
listener adminListener{
  address               *:9000
  secure                1
  keyFile               $SERVER_ROOT/admin/conf/webadmin.key
  certFile              $SERVER_ROOT/admin/conf/webadmin.crt
  clientVerify          0
}
After saving the changes, you may need to restart OpenLiteSpeed for the modifications to take effect.
sudo systemctl restart lsws
Then, open your respective port on the firewall using the ufw command.
sudo ufw allow 9000/tcp
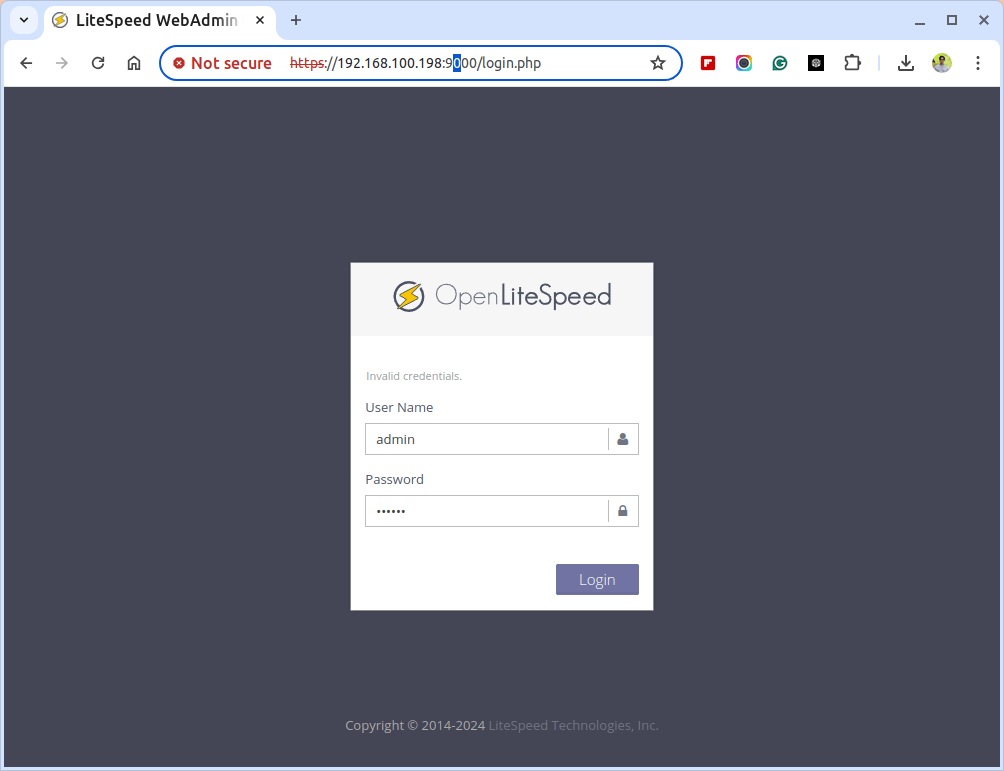
After changing the listener port in an admin configuration file, you’ll need to access the WebAdmin interface using the updated port number (9000 in this case).
http://your-server-IP:9000
Conclusion
Due to its exceptional performance, the OpenLiteSpeed server is the first choice of web developers and administrators. This how-to guide explains how to install and set up the OpenLiteSpeed web server on Ubuntu 22.04.
We’ve also listed a few ways to protect its WebAdmin console so your security stays unharmed. You can now use the OpenLiteSpeed web server on your Ubuntu machines to host websites, web applications, CDNs, or any other microservice platform.