CPU cores are essential for effectively processing data and carrying out computations in the world of computers. Disabling CPU cores may be useful in some circumstances, though.
This page attempts to instruct Ubuntu users on the proper usage of CPU core disablement. We’ll talk about why cores should be disabled, how to do it either temporarily or permanently, and how to check the system thereafter.
Check CPU Cores in Ubuntu
Knowing how many cores your Ubuntu system has is crucial before beginning the procedure of CPU core disablement. Various command-line tools and graphical applications that offer thorough CPU monitoring can be used for this. You’ll be better able to decide whether to disable cores by understanding the CPU configuration of your machine.
To check how many cores are available in our system we will use the lscpu command line utility, which provides complete information about the CPU like CPU vendor details, the number of CPUs or cores, etc.
To install lscpu on Ubuntu, use the apt command:
$ sudo apt-get install util-linux
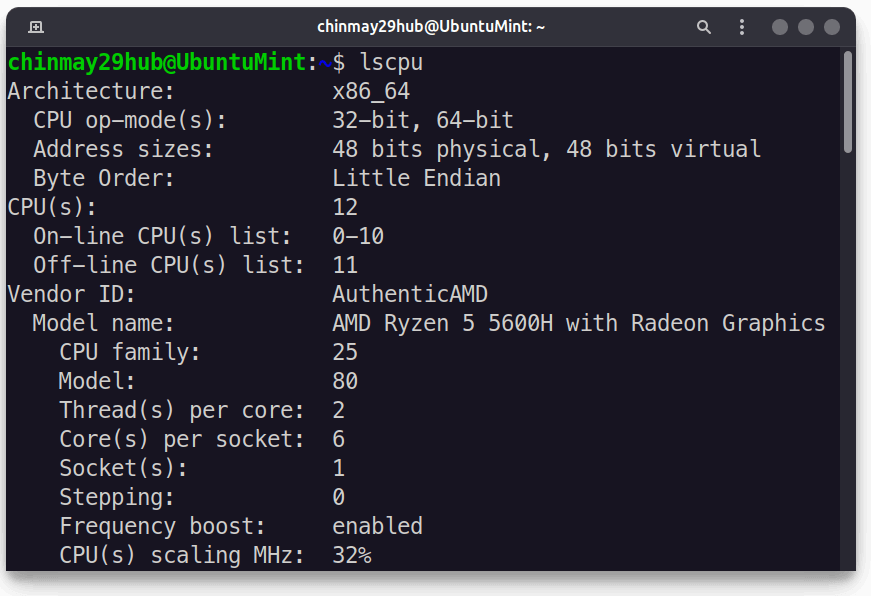
Run the lscpu command to display the information:
$ lscpu
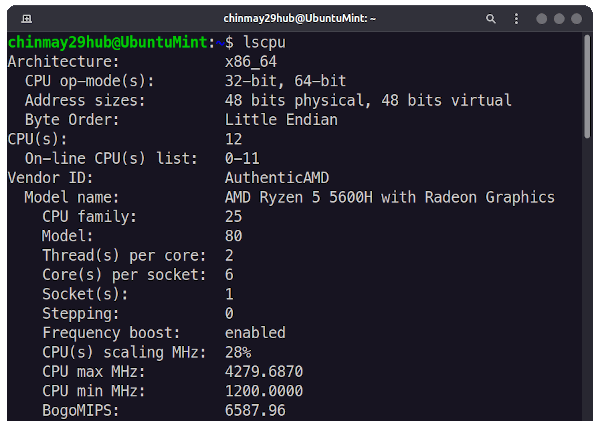
As we can clearly see in the “CPU(s)” field there are 12 CPU cores available.
Why Disable CPU Cores in Ubuntu?
There are many reasons why a user may want to disable their Ubuntu’s system CPU cores. The two most significant reasons are energy efficiency and power consumption.
By disabling CPU cores, you can reduce power usage and promote energy conservation. On top of that disabling CPU cores can improve system stability and minimize heat generation. Which will result in a cooler system just like you.
It is a good idea to disable the cores that are causing problems to narrow down any hardware issues.
Method 1: Disable CPU Cores Temporarily in Ubuntu
We can disable CPU cores in Ubuntu by modifying “online” files present in “/sys/devices/system/cpu/cpuN” where N represents each CPU core number. Each core has its dedicated folder.
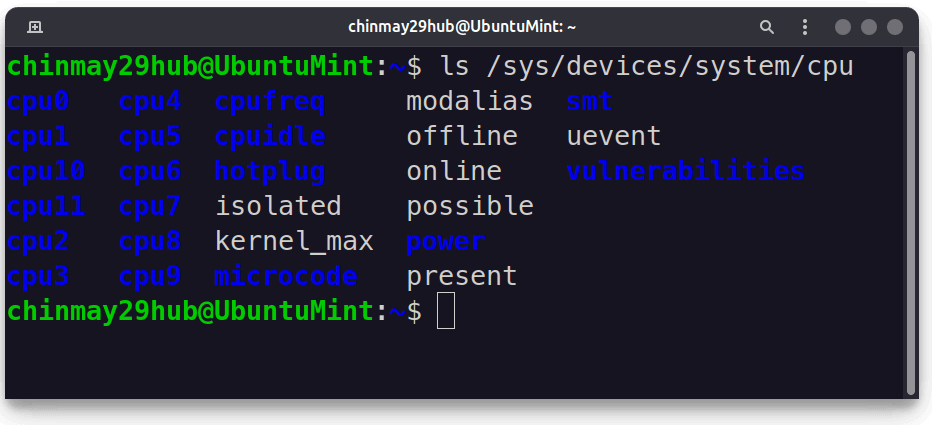
Let us see the list of core folders:
$ ls /sys/devices/system/cpu
NOTE: While the system is operating, CPU0, sometimes referred to as the main core or boot processor, cannot be turned off. This core is in charge of processing crucial activities that are crucial for the system’s functioning as well as initializing the system during the boot process. The system would become unusable if CPU0 were disabled.
The primary core, commonly designated as CPU0, is where the operating system and other crucial activities are initially loaded. It controls system resources and organizes the operation of other cores. The system would lose control and be unable to function as planned if CPU0 were disabled.
Even though you might be able to update the “online” file for CPU0, the modifications won’t do anything. The system will continue to rely on the core for appropriate operation while it is still operational. Therefore, attempting to deactivate CPU0 is not advised.
Let’s say I want to disable core 12 of my CPU. I will first navigate to that core directory.
cd /sys/devices/system/cpu/cpu11
NOTE: In computer science and programming, a convention is followed to start indexing or counting from 0.
There is a file called “online” which contains “0” or “1”. Where 0 represents that the core is disabled and 1 represents whether the core is online or active.
Let’s display the file’s content:
$ cat online
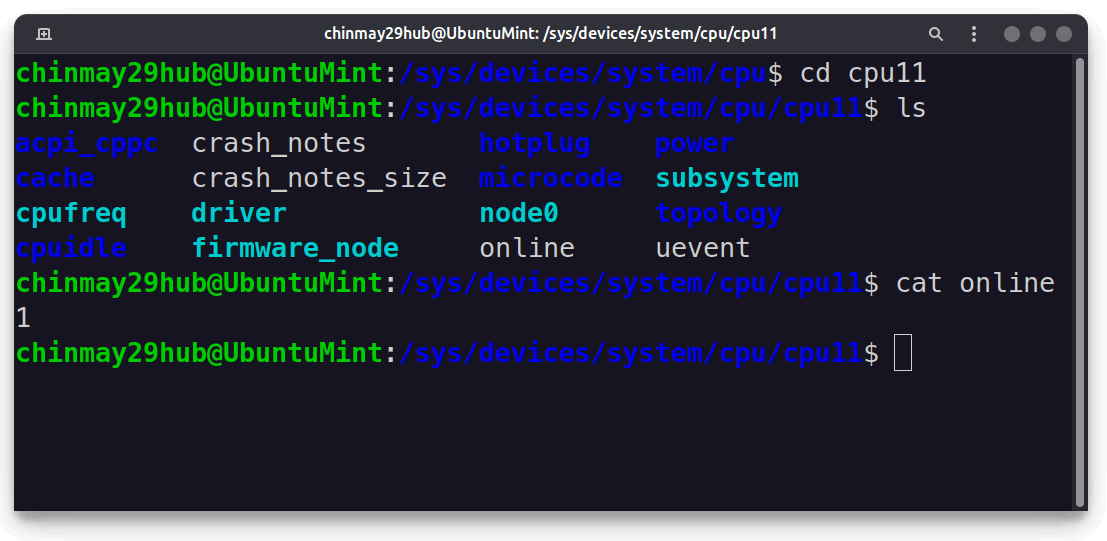
It say’s “1”, therefore the core is online.
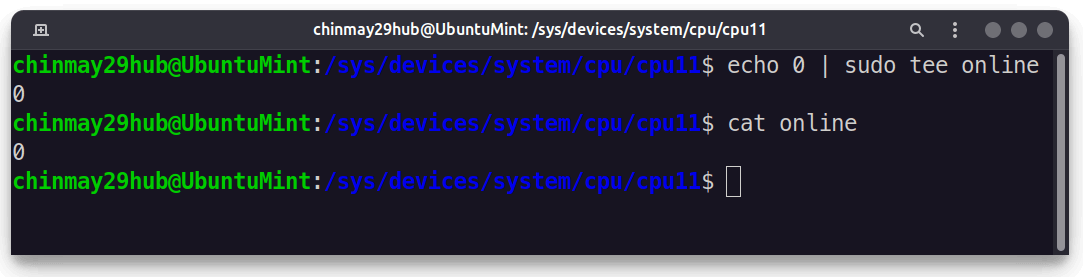
To disable the core we just need to modify the “online” file and change the “0” to “1”.
$ echo 0 | sudo tee online
The core will now be disabled we can again verify it.
$ cat online
Another way to verify is using the lscpu command again which will provide detailed information.
$ lscpu
In the CPU(s) section we can clearly see that 11 cores are currently enabled and 1 core is disabled.
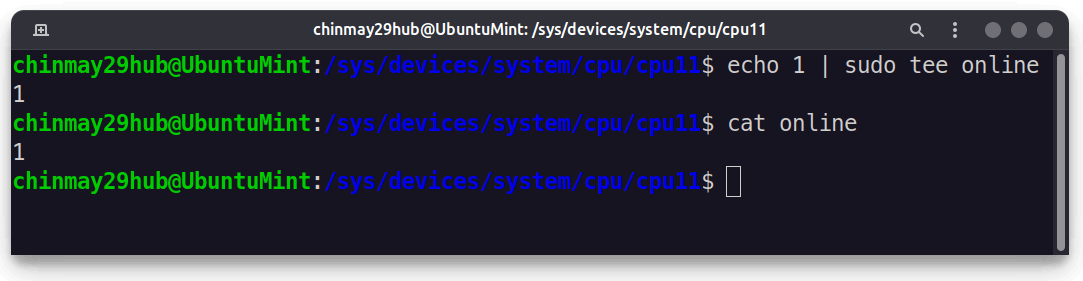
To enable that core again to follow the same above procedure just change “0” to “1”:
$ echo 1 | sudo tee online
$ cat online
This approach is very helpful when you need to assess system performance fast or address core-specific problems. Keep in mind that until the subsequent system reboot or manual re-enabling, this technique only temporarily disables the CPU core.
Consider utilizing the techniques that we will be discussing further in the article if you wish to deactivate CPU cores permanently.
Method 1: Disable CPU Cores Permanently in Ubuntu
To disable cores permanently, which means the cores remain disabled even after the system is rebooted we just need to tweak the grub configuration file.
$ sudo nano /etc/default/grub
Search for this line:
GRUB_CMDLINE_LINUX_DEFAULT
Add the “quiet splash” to the line. For me, the existing values are something like.
GRUB_CMDLINE_LINUX_DEFAULT="quiet splash"
Change the value by adding the number of CPUs you want the Ubuntu system to use. Do not remove the existing values just add your content by separating it with a space character.
GRUB_CMDLINE_LINUX_DEFAULT="quiet splash maxcpus=6"
The “maxcpus=6” for using only 6 cores.

Now, system to take effect we need to update grub.
$ sudo update-grub
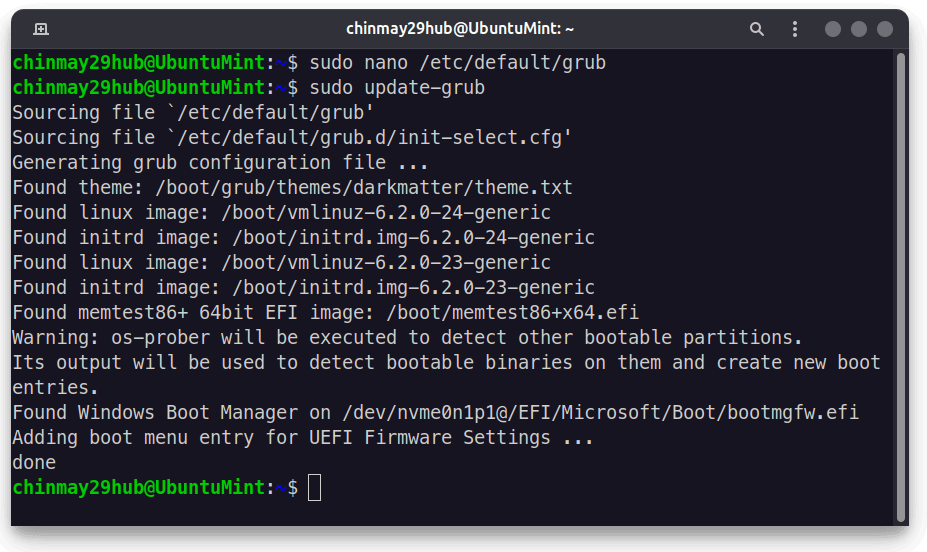
When you reboot your system only 6 cores will be used by the Ubuntu system.
Conclusion
On Ubuntu disabling cores can be beneficial to optimize power consumption and troubleshoot hardware issues. It’s up to you to go for the temporary to the permanent approach but monitor your Ubuntu’s performance and check that the disabled CPU cores are functioning as intended.
By following the steps in this article you can now confidently enable or disable cores on your Ubuntu system by customizing the system performance according to your need.
Excellent article. I have a question.
Nowadays we use computers only for YouTube viewing. I think it doesn’t require much processing power. So will it be helpful?
Thank you for your feedback! Disabling CPU cores can help reduce power consumption and heat generation, which can be beneficial for overall system efficiency.
While YouTube viewing may not require much processing power, disabling cores can still contribute to a cooler system and potentially optimize performance.
Thank you for this blog!
As an alternative, you can also use the command “chcpu“.
Disable CPUs:
Enable CPUs:
Thank you for your feedback and for sharing an alternative method using the “chcpu” command to disable and enable CPUs.
It’s great to have multiple options for achieving the same result. Your suggestion provides another useful approach for managing CPU cores in Ubuntu systems.