So, you’ve heard about the amazing power of Kali Linux for penetration testing and ethical hacking, and you want to give it a try, right? But, here’s the thing – you love your Windows 10 setup, and the thought of switching to a whole new operating system seems a bit overwhelming. Well, fear not! I’ve got some fantastic news for you!
Guess what? You can install Kali Linux right on your Windows 10 system without the hassle of dual-booting or messing with partitions. How cool is that?
In this article, I’ll walk you through the step-by-step solution, so you can have the best of both worlds – the mighty Kali Linux powers and the familiar Windows environment.
It’s time to unleash the potential of Kali Linux within your Windows 10 setup. So, let’s begin the awesome journey of installing Kali Linux on your Windows 10!
Note: If you want to learn more about Kali Linux, including its features, history, and more, check out one of our articles about the history of Kali Linux.
Before starting with the installation of Kali Linux on Windows 10, it is important to know about WSL.
What is WSL?
The Windows feature name WSL (short for Windows Subsystem for Linux) is like magic for those who want to run a full Linux distribution right on their Windows machine.
With WSL, you can use Linux utilities and applications without the need to switch to a separate Linux machine or set up complex virtual machines.
Now let’s delve into the procedure of installing Kali Linux on Windows 10 by utilizing these methods:
How to Install Kali Linux on Windows 10 Using PowerShell (WSL)
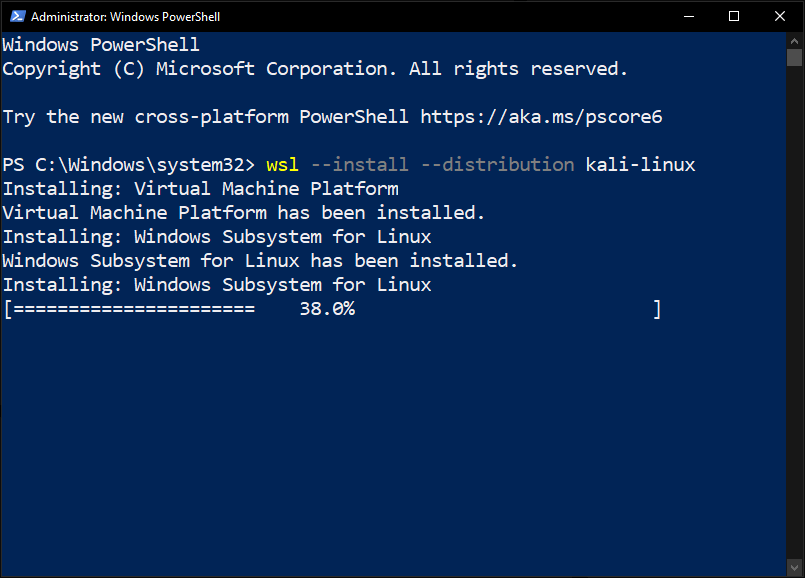
To install Kali Linux on Windows 10 Using PowerShell (WSL), open the PowerShell as an administrator and execute the provided command.
wsl --install --distribution kali-linux
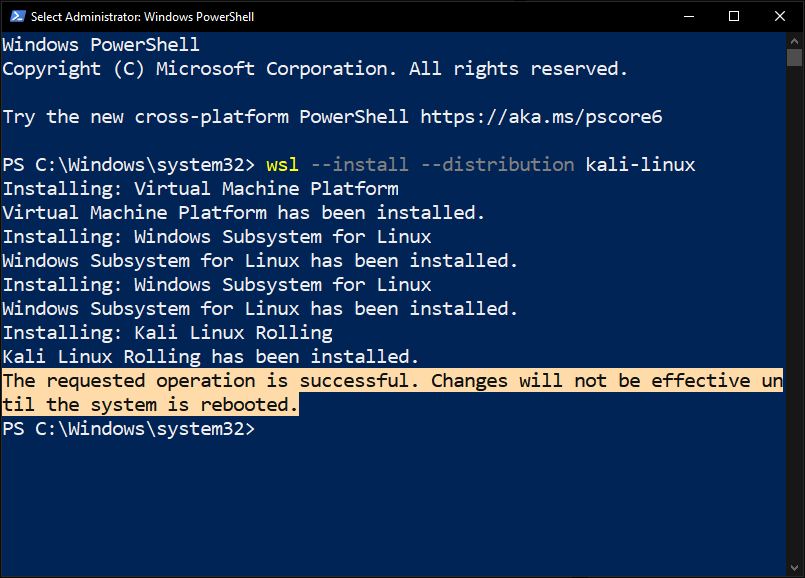
This command will automatically enable the “Windows Subsystem for Linux” and “Virtual Machine Platform” feature and install the Kali Linux as specified with “--distribution”.
After some time the Kali Linux will be installed and you just simply need to restart your Windows, to further proceed with the installation.
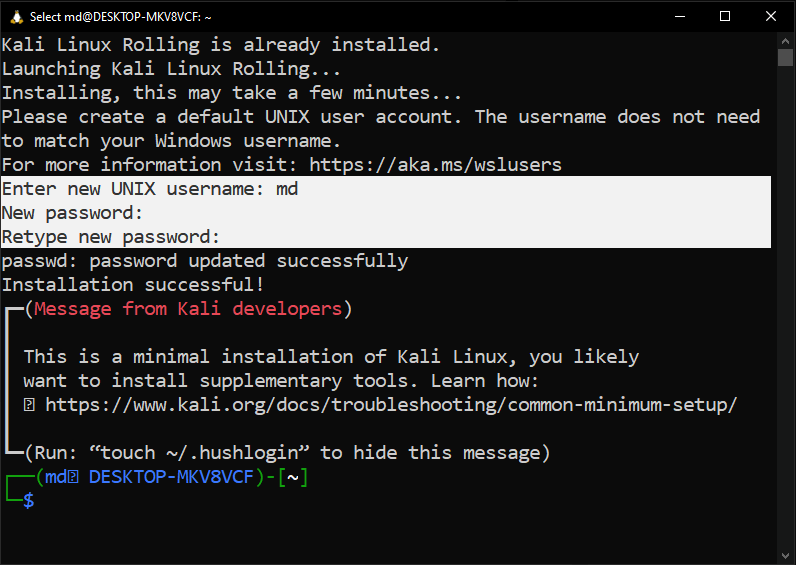
After restarting the system, the popup screen will display “Launching Kali Linux Rolling…”, so wait for its completion.

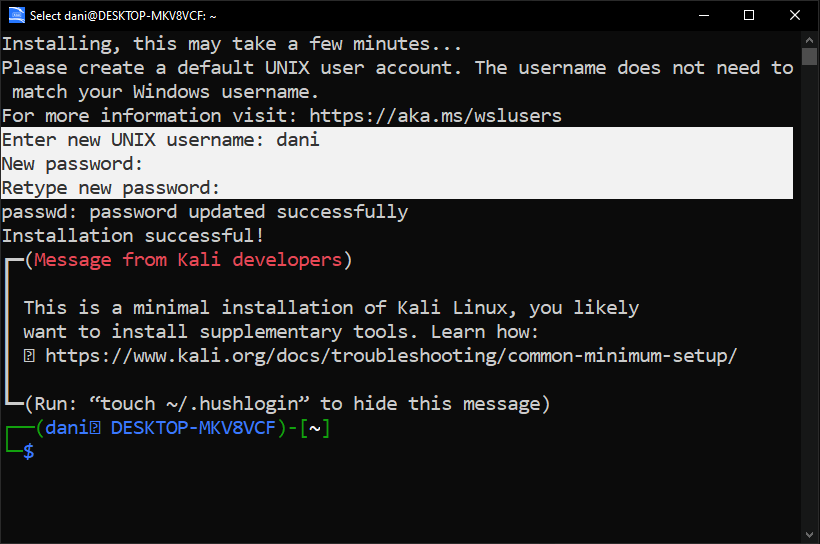
Once the whole setup is completed, you will be asked to enter the new UNIX username and Password. After entering the username and password you will see that the installation process has been completed.
This was the simplest and easiest method to install Kali Linux on Windows 10. Now, let’s move to the next method.
How to Install Kali Linux on Windows 10 via GUI
To install Kali Linux on Windows 10 using GUI, you need to follow very simple steps as given below.
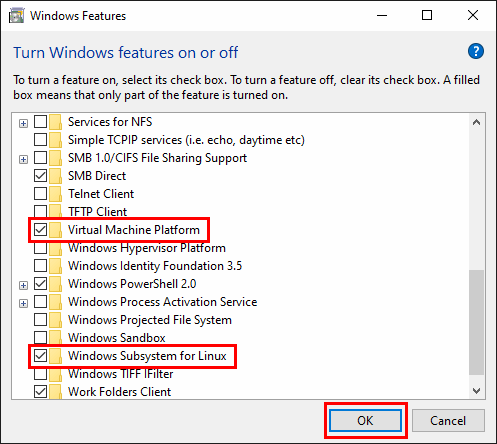
Turn On Window Features
To enable windows features, make sure to enable the WSL and Virtual Machine platform features. That can be done by pressing the “Windows + S” button, typing “Turn Windows features on or off” and pressing the Open button.
Install Windows Subsystem for Linux
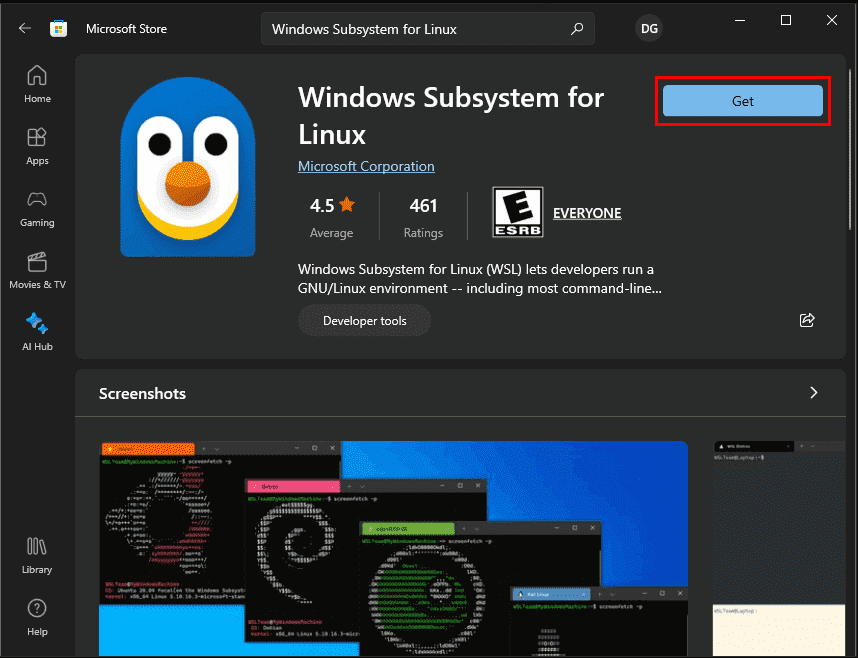
To install WSL, open the “Microsoft Store”, search for “Windows Subsystem for Linux” and install it.
Install Kali Linux On Window
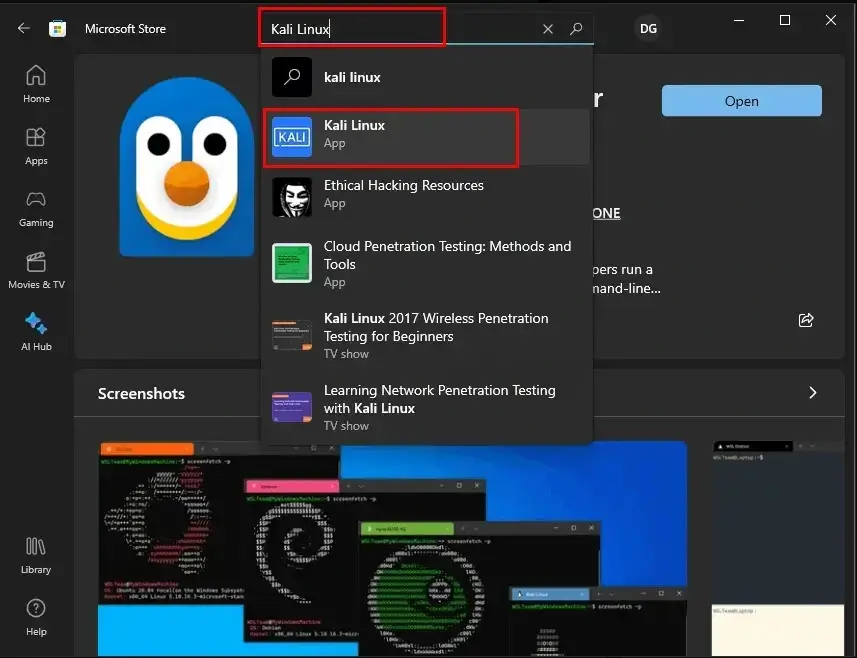
After the successful installation of “Windows Subsystem for Linux”, let’s install Kali Linux by searching “Kali Linux”.
And clicking on the “Get” button.
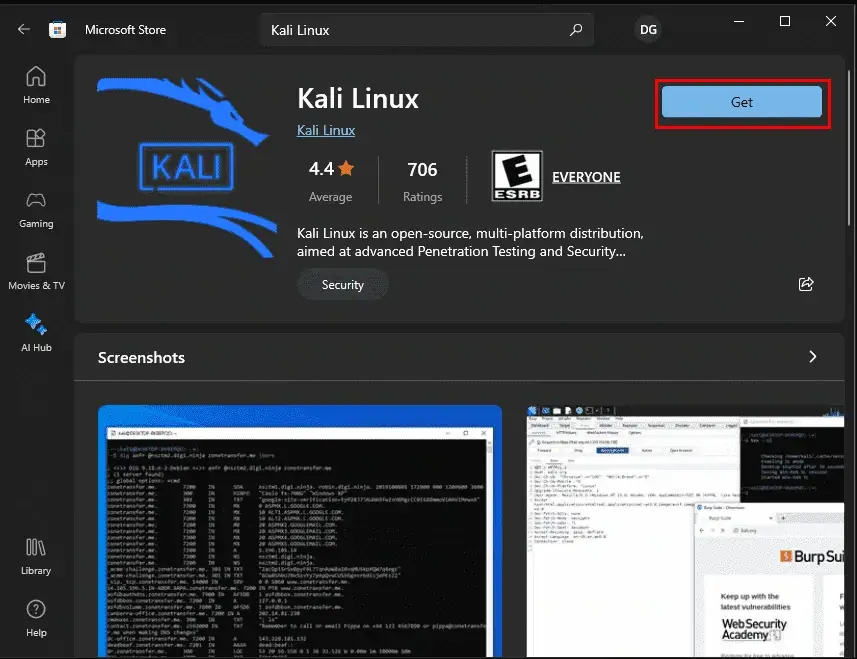
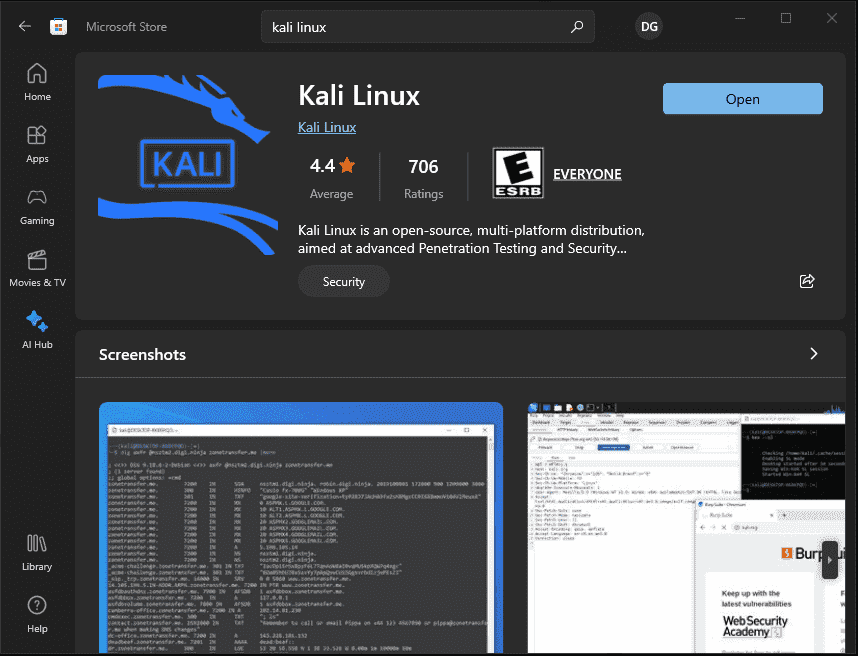
It will take some time to get installed, so wait until the “Open” button displays in place of “Get”, which means that Kali Linux has been installed.
After the successful installation of Kali Linux, simply restart your Windows system.
Once the system is restarted, now you need to complete the further installation procedure by setting the username and password. To do so, click on the “Windows + S” button, search for Kali Linux, and click on the “Open” button.
Again it will take some time to ask you to enter the new username and password. After this, your Kali Linux will successfully install in your system.
After successfully launching Kali Linux, open the terminal and run the following commands to update the package lists and upgrade installed packages:
$ sudo apt update
$ sudo apt upgrade
Note: If you want to learn more about the installation of Kali Linux, take a look at Kali’s Official website.
Conclusion
With these steps completed, you now have Kali Linux installed and running on Windows 10 using WSL. You can use Kali Linux’s tools and utilities for various penetration testing and security-related tasks directly on your Windows system.
Remember that Kali Linux on WSL is intended for educational and non-production use. If you require the full Kali Linux experience with direct hardware access, consider installing Kali Linux on a separate partition or in a virtual machine.