Secure Shell, popularly known as SSH, is a secure network protocol that allows users to securely connect to remote hosts such as servers. It is based on a client-server architecture and uses two main authentication methods – password and ssh-key pair authentication.
The SSH-key pair authentication employs the use of SSH keys which are cryptographic keys used to authenticate and secure communication between the client and the server. SSH-key pair authentication is preferred over password authentication as it provides safer authentication which is not susceptible to brute-force attacks.
In this tutorial, we illustrate how you can set up SSH keys on AlmaLinux.
Creating RSA SSH Key Pair in AlmaLinux
To start the show, we will create an RSA key pair which comprises a public and private key. We will demystify these keys later on in the guide. To create the key pair, run the command:
$ ssh-keygen
OR
$ ssh-keygen -t rsa
The above commands create a 2048-bit RSA key pair which is considered good enough to offer decent encryption to secure communication. However, you can create a 4096-bit key pair that is more robust and offers better encryption.
To do this, simply pass the -b flag. This is exactly what we are going to do.
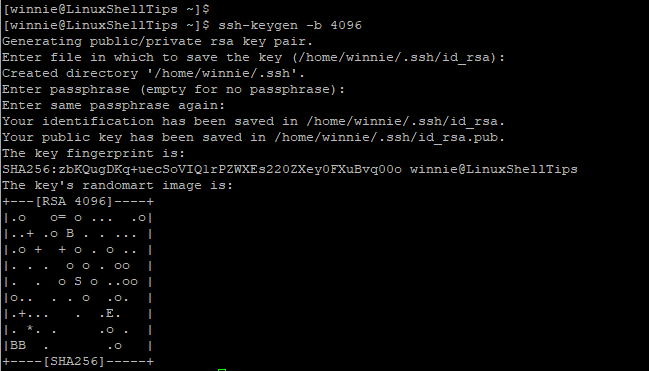
$ ssh-keygen -b 4096
Right after you press ENTER, you will be asked to provide the path in which the keys will be stored. By default, this is the ~/.ssh directory. Unless required to change it to a different path, just go with the default directory by pressing ENTER.

Thereafter, you will be required to provide a passphrase or a password. While optional, this adds an extra layer of protection when authenticating.
However, this is limiting when you want to configure passwordless ssh-key authentication to a remote host. If this is your goal, then simply press ‘ENTER’ to skip providing the keyphrase.

Here is the entire output of the command.
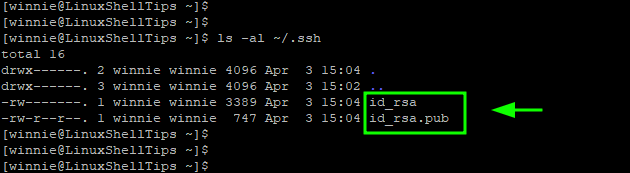
At this point, your keys should be stored in the ~/.ssh directory which is a hidden directory in your home directory. Just to confirm this, run the command:
$ ls -la ~/.ssh
A few points to note:
- The id_rsa is the private key. As the name suggests this should be kept extremely confidential and should never be divulged or shared. An attacker can easily compromise your remote host once they get a hold of the private key.
- The id_rsa.pub is the public key, which can be shared without any problem. You can save it to any remote host that you want to connect to.
Copy SSH Public Key to Remote Linux Server
The next step is to copy or transfer the public key to the remote server or host. You can do this manually, but the ssh-copy-id command easily allows you to do this.
The ssh-copy-id command takes the following syntax:
$ ssh-copy-id user@remote-host-ip-address
In our setup, we have a remote host with IP 172.105.135.246 and a configured remote user called jack.
To copy the public SSH key, we will run the command:
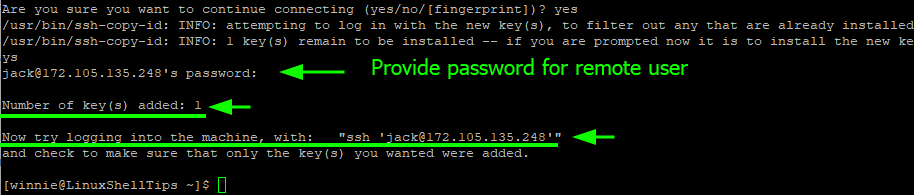
$ ssh-copy-id [email protected]
If this is the first time connecting to the host, you will get the output shown below. To proceed with the authentication, type ‘yes’ and hit ENTER to proceed.
Once you provide the password and press ‘ENTER‘ the public key is placed in the authorized_file file in the ~/.ssh directory on the remote host.
On your local system, the known_hosts file is created in the ~/.ssh directory. The file contains the SSH fingerprints for remote hosts that you have connected to.
$ ls -la ~/.ssh
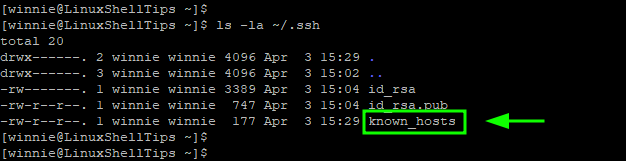
You can view it as follows.
$ cat ~/.ssh/known_hosts

SSH Passwordless Login to Remote Linux
With the public key now saved on the remote host, we can now login to the remote host without SSH password authentication. To test this, we will try logging in normally to the remote host.
$ ssh [email protected]
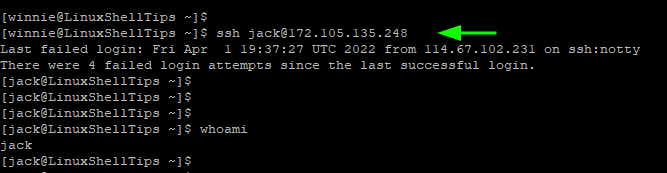
From the output, you can see that we straight away dropped to the remote system’s shell. This confirms that we have successfully configured SSH Passwordless authentication.
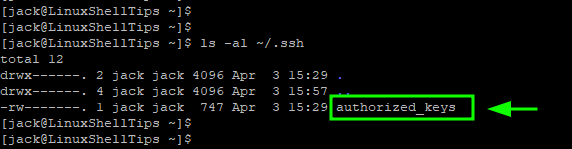
Now confirm that the public key is saved in the authorized_keys file on the remote host.
$ ls -la ~/.ssh/
To view the file, use the cat command as follows.
$ cat ~/.ssh/authorized_keys

Disable SSH Password Authentication
We are not yet done, the password authentication is still enabled and this can potentially subject the remote server or host to brute-force attacks.
To eliminate this attack vector, it is highly advised to disable password authentication. This ensures that login is only possible through an SSH key pair. To achieve this, open the sshd_config file which is the main SSH configuration file.
$ sudo vim /etc/ssh/sshd_config
Locate the PasswordAuthentication directive. If commented out, uncomment it and set it to ‘no’.
PasswordAuthentication no
Save the changes and exit the file.
Then restart SSH to apply the change made.
$ sudo systemctl restart sshd
This successfully disables password authentication and only users with the private SSH key can log in.
At this point, SSH password authentication has been disabled on the remote server and the only possible way of accessing the remote server is through public-key authentication.
We have managed to set up SSH keys on Almalinux and even went ahead to configure passwordless SSH authentication using SSH-key pair. We further disabled password authentication to avert brute-force attacks.