The well-known open-source operating system Ubuntu provides a fluid user interface and a variety of programs for different uses. The capability to take excellent screenshots is a crucial feature for many Ubuntu users.
Having dependable snapshot tools may greatly increase your productivity, whether you want to preserve an image, communicate information, or give visual feedback. We will look at some of the top screenshot tools for Ubuntu users in this article.
1. GNOME Screenshot
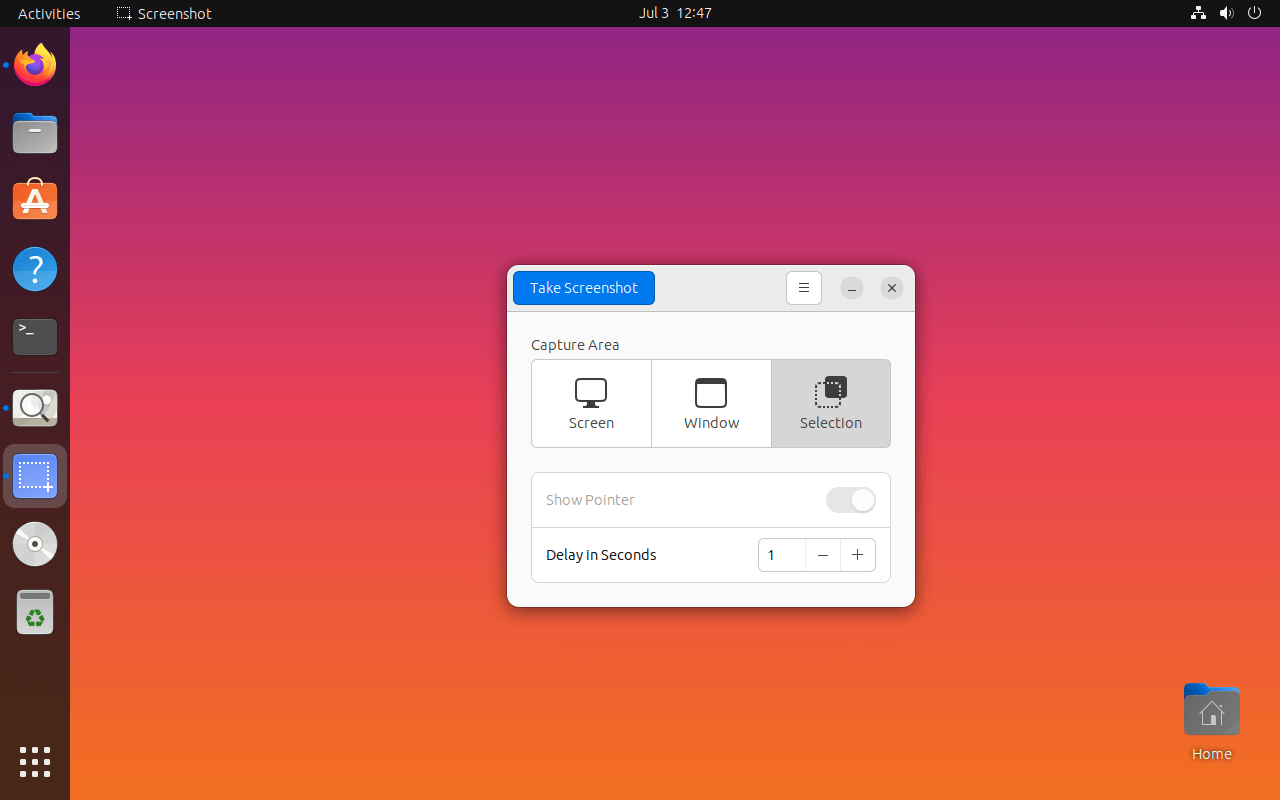
With Ubuntu, a built-in screenshot tool called GNOME Screenshot is pre-installed. It is suited for both novice and experienced users because of its straightforward and user-friendly layout.
With GNOME Screenshot, you may take a screenshot of the whole screen, a particular window, or even a specific region. Additionally, it offers a number of naming and storage choices for your screenshots.
To take a screenshot, adhere to the following steps:
- On your keyboard, press the “Print Screen” button to take a full screen of your desktop.
- To screenshot the currently open window, use “Alt + Print Screen“.
- To capture a specific region, use “Shift + Print Screen“. You may specify the region you wish to capture by clicking and dragging the mouse.
To install GNOME Screenshot run the following command.
$ sudo apt install gnome-screenshot
GNOME Screenshot offers a number of benefits, which don’t need to be installed separately because it is compact, user-friendly, and pre-loaded with Ubuntu. Furthermore, it provides essential snapshot features that meet the needs of the bulk of customers.
GNOME Screenshot does have certain restrictions, though. It lacks sophisticated editing and annotation tools, which may be essential for those that need to customize their images more thoroughly. You might wish to think about utilizing third-party screenshot programs for Ubuntu if you want sophisticated features.
2. Shutter – Screenshot Tool
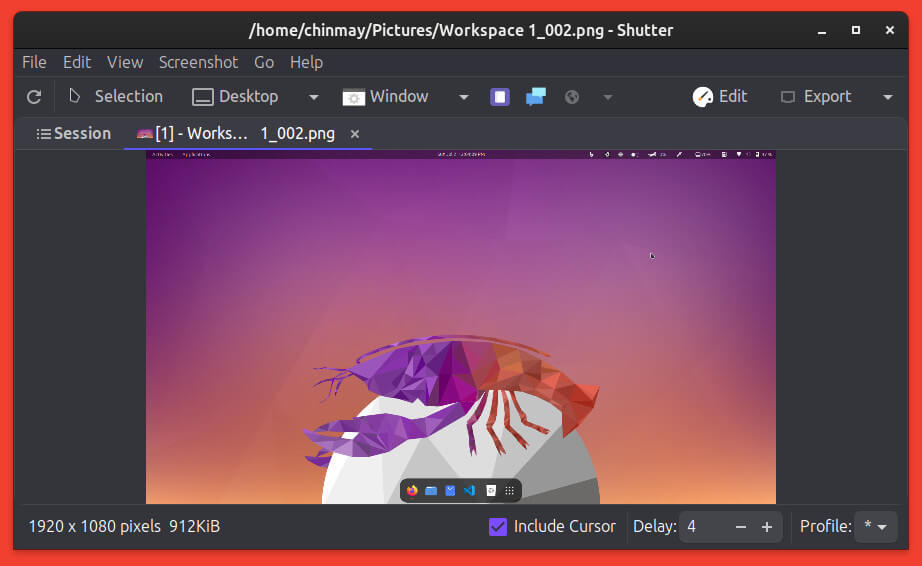
Shutter is a powerful editing and annotating application for Ubuntu that has a wealth of screenshot options. Users who need greater flexibility and control over their screenshots frequently choose it.
Shutter key features and capabilities to make taking screenshots easier.
- Capture Mode – Shutter’s capture modes let you record the full screen, a particular window, a chosen region, or even a webpage that is scrolling. You can record exactly what you need thanks to this versatility, after all.
- Editing and Annotation Tools – Shutter’s comprehensive editing facilities are one of its best qualities. To crop, resize, rotate, and annotate your screenshots, a variety of tools are available. Text, arrows, shapes, and, if necessary, the pixelation of sensitive information are all options.
- Advanced Features – Shutter offers sophisticated features including timed and delayed captures, as well as the capacity to record tooltips and menus. These choices make it simpler to record particular components or behaviors in your Ubuntu system.
To install Shutter firstly launch a new terminal session with “CTRL + ALT + T”. Since the shutter is present in the official Ubuntu repository we can install it using apt manager.
$ sudo apt install shutter
Search in the applications for “shutter” and launch it to start capturing screenshots.
3. Flameshot – Screenshot Tool
For Ubuntu, Flameshot is a potent snapshot tool that blends intuitive use with sophisticated annotating tools. It distinguishes itself with a user-friendly interface and a wide range of editing options, making Ubuntu users favor it.
Flameshot distinguishes itself from other snapshot programs with a number of special features, including:
- Flameshot’s customizable annotation feature lets you add text, arrows, shapes, and freehand drawings to your screenshots. You have complete control over the visual elements thanks to the option to alter the color, thickness, and style of these annotations.
- With Flameshot, you can rapidly post your screenshots to well-known picture-hosting websites like Imgur. It produces a shared link that makes it simple to let others see your captures.
- Flameshot offers a variety of picture-altering features, such as cropping, resizing, blurring, and pixelation. When you need to edit your screenshots or conceal sensitive information, these capabilities are helpful.
You can install flameshot using:
$ sudo apt install flameshot
Once the installation is complete, you can launch Flameshot from the Applications menu. When you first launch flameshot it will not open the applications but will display an icon in the system tray:
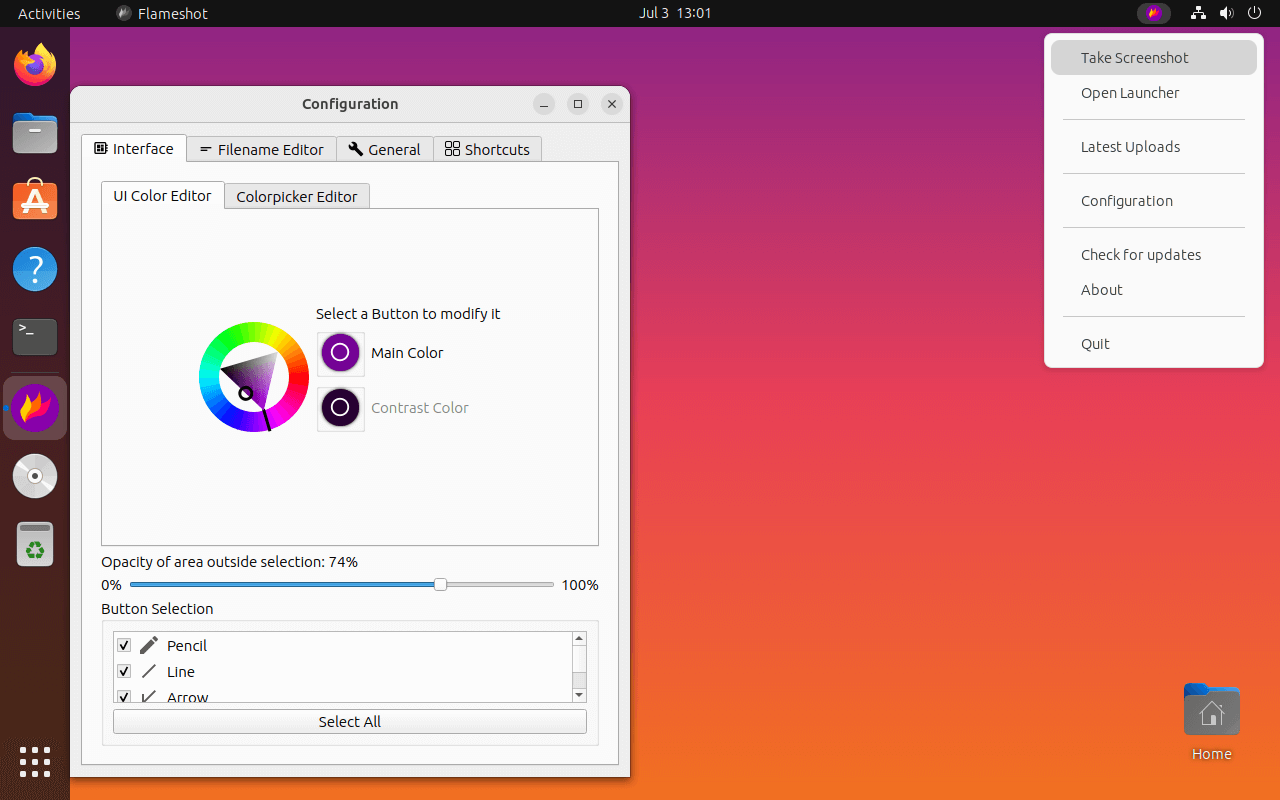
click on “Take Screenshot” in the system tray menu – You can either select a region or capture the whole screen. At the bottom of the selection, you see the cool features you can try.
4. Ksnip – Screenshot Tool
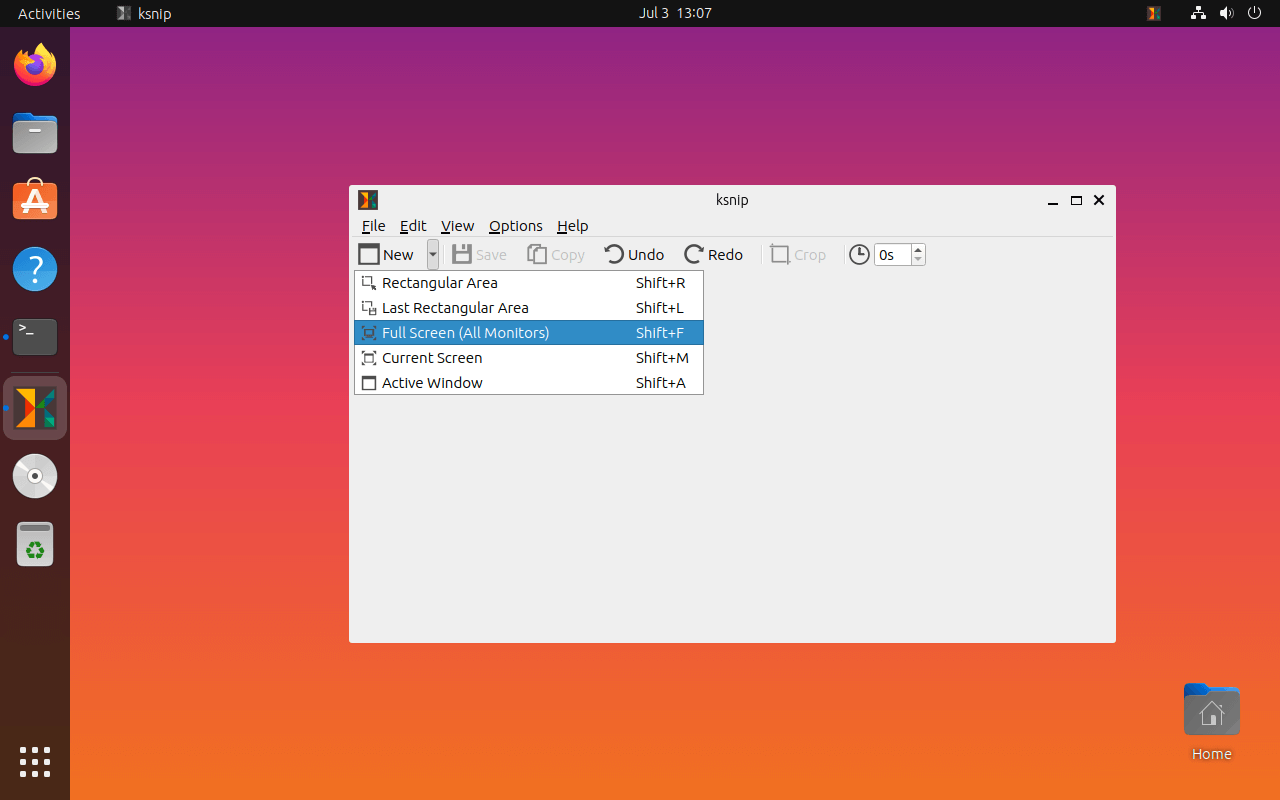
Ksnip is a flexible and user-friendly screenshot tool created exclusively for Ubuntu users, which is a useful addition to your workflow since it offers a variety of functions that address various screenshot-taking and editing requirements.
Ksnip stands out thanks to its clear and simple UI with quick access to key functions that greets you when the program first launches.
Let’s look at some of the main characteristics that make Ksnip a preferred option for Ubuntu users:
- Capture Modes – Ksnip offers a number of capture options, such as full-screen, window, and area capture. Additionally, it has the option to capture scrolling web pages, which comes in handy when you need to record a complete webpage that spans the whole visible screen.
- Tools – An extensive collection of annotation tools for modifying and improving your screenshots. You may highlight particular portions of the capture as well as add text, shapes, and arrows. You can even render important information.
- Delayed Capture – Occasionally, you might want a few more seconds to position the correct window or screen before taking a screenshot. By allowing you to select a delay before capturing, Ksnip ensures that you may take your time and capture precisely what you need.
To install Ksnip run the following command.
$ sudo apt install ksnip
Knip system tray icon is launched when you first open the application.
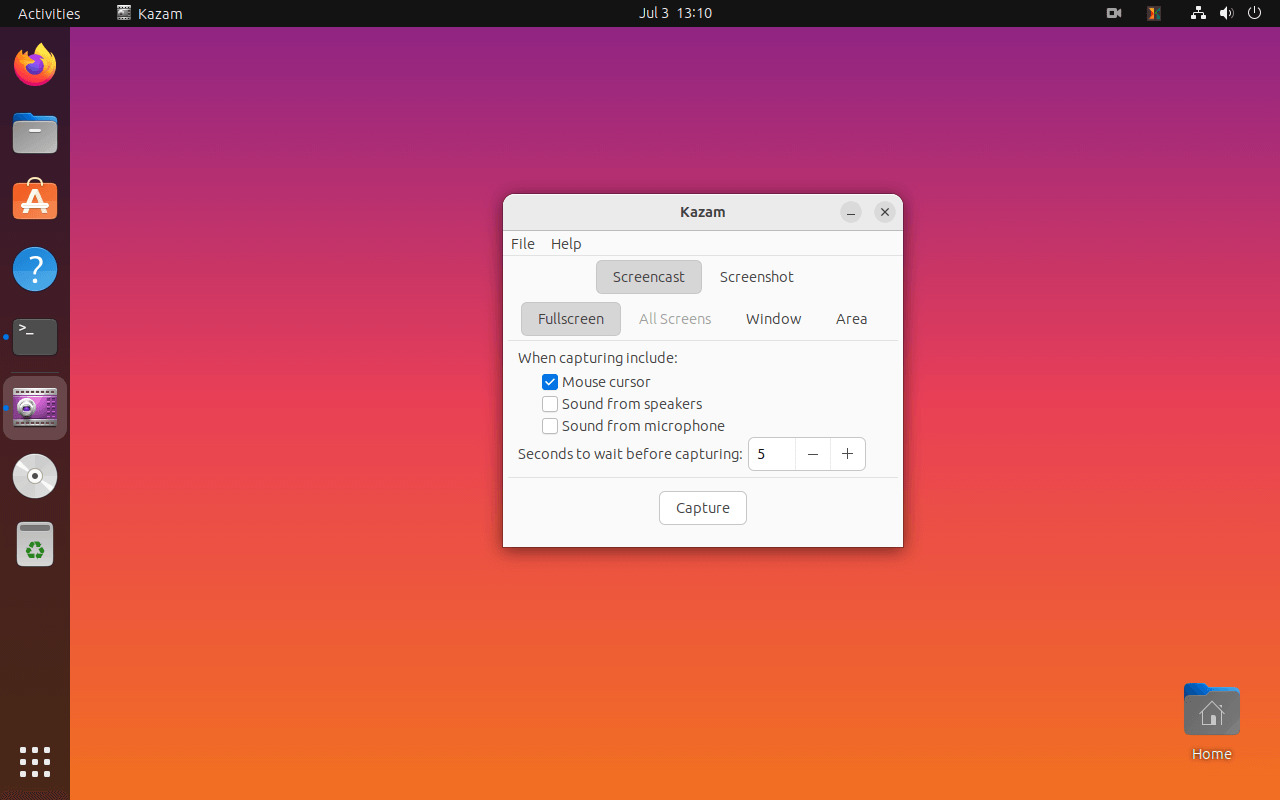
5. Kazam – Screenshot Tool
Another well-known screenshot tool for Ubuntu users is Kazam, which has a variety of functions for taking screenshots and recording videos of your screen. It is a flexible choice for Ubuntu users since it offers snapshot functionality in addition to its primary reputation as a screen recording tool.
Key Kazam Features:
- Screenshot Capture – It makes it simple to take screenshots. There are three options available to you: recording your full screen, a specific window, or a specific portion of it. You may pick what information you want to capture, which is freedom.
- Timed Capturing – It has a useful timed capture function that lets you choose a delay before taking a screenshot. When you want to set up a certain screen state or capture a precise moment, this tool is helpful.
- Simple User Interface – It has a straightforward user interface that makes it simple to move around and access the screenshot functions. For users of various levels of competence, it offers a simple and intuitive experience.
To install Kazam run the following command.
$ sudo apt install kazam
While Kazam’s screen recording skills are its major strength, its screenshot functions provide a dependable and practical option for taking pictures on Ubuntu.
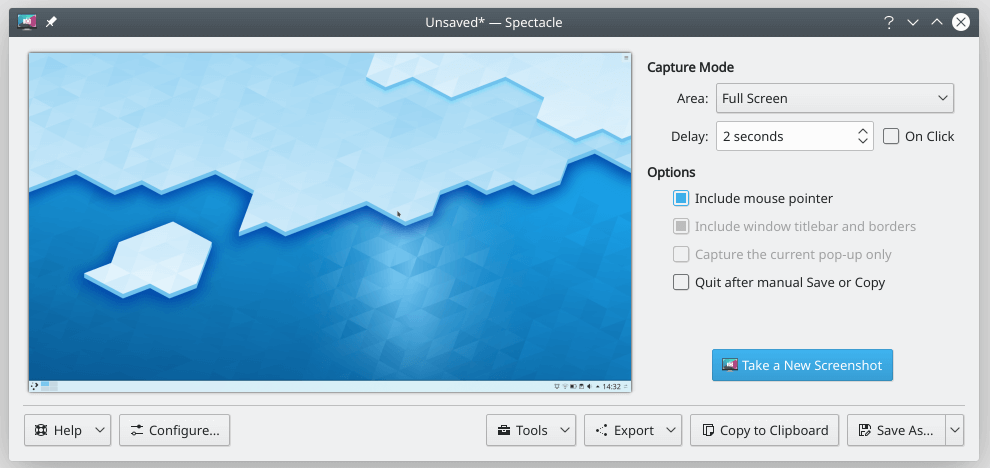
6. Spectacle – Screenshot Tool
The KDE Plasma desktop environment is a favorite among Ubuntu users, and Spectacle is a potent screenshot tool created especially for it. It is a useful application for taking screenshots on Ubuntu since it has many features and customization possibilities.
Key Characteristics of Spectacle:
- Capture – It has options that let you take screenshots in a variety of configurations, including full-screen, window, rectangle region, and individual monitor. With this versatility, whether it’s a single window or numerous screens, you can capture exactly what you need.
- Shortcuts – Shortcuts that may be customized are offered by Spectacle, enabling you to designate particular keys for various capture modes. With the help of this tool, you may easily access the chosen screenshot mode without having to go through a menu.
- Delayed Capture and Multiple Takes – It has a delay feature that lets you specify a timer before taking a screenshot. When you need to set up the screen or carry out particular tasks before taking a screenshot, this tool is helpful. A sequence of screenshots may be easily taken with the help of Spectacle’s ability to allow several photos to be taken consecutively.
To install Spectacle run the following command.
$ sudo snap install spectacle
The fact that Spectacle was developed specifically for the KDE Plasma desktop environment should be mentioned. Even while it may be installed and used on Ubuntu, it may also require additional KDE environment requirements and libraries.
Conclusion
For Ubuntu users to properly capture, modify, and share information, trustworthy screenshot tools are a need. These apps may greatly improve your productivity and communication whether you’re a professional, student, or casual user.
To discover the one that best meets your needs and to take screenshots on your Ubuntu system without any problems, experiment with the suggested screenshot programs. Happy screenshotting on Ubuntu!