This blog will offer an optimal solution for installing the latest as well as a specific version of Ubuntu in your Windows by using WSL.
What is WSL?
WSL (stands for “Windows Subsystem for Linux“) is a feature of Microsoft Windows that allows the user to run Linux distribution alongside Windows by utilizing a compatibility layer. It was released in 2016, however, the current version is WSL 2, which supports numerous Linux distributions including Ubuntu, Debian, and Fedora.
WSL is a beneficial feature for developers as it eliminates the need for extra hardware, virtualization, or dual-boot setups to manage Linux file systems or to access Linux command-line and tools.
With WSL, one can seamlessly switch between Windows and Linux workflows, enabling them to take advantage of Linux-specific tools while still enjoying the features of Windows as their primary operating system.
Let’s start the installation process of Ubuntu on Windows by using WSL 2.
Enable Windows Subsystem for Linux on Windows
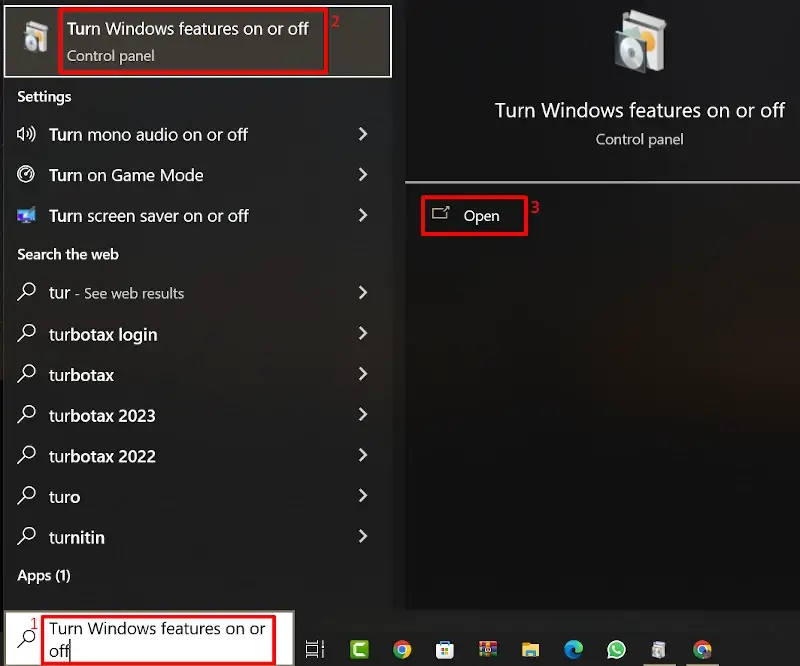
To enable WSL, press the “Windows Logo + S” keys and search “Turn Windows features on or off”, then, click on the “Open” option.
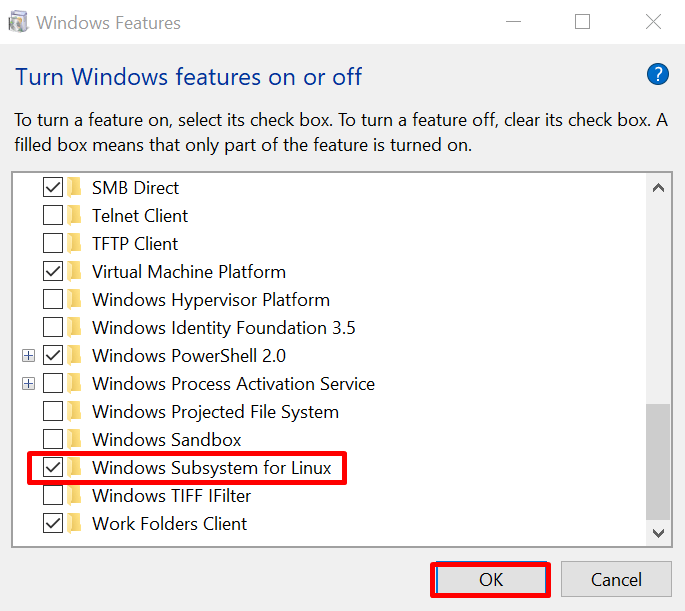
The Windows feature dialogue box will open. Here, locate the option “Windows Subsystem for Linux” and select the checkbox associated with it. Finally, click on the “OK” button:
Now restart your Windows to enable WSL.
Install Ubuntu on Windows via WSL
The process of installing Ubuntu on Windows by using WSL is quite straightforward.
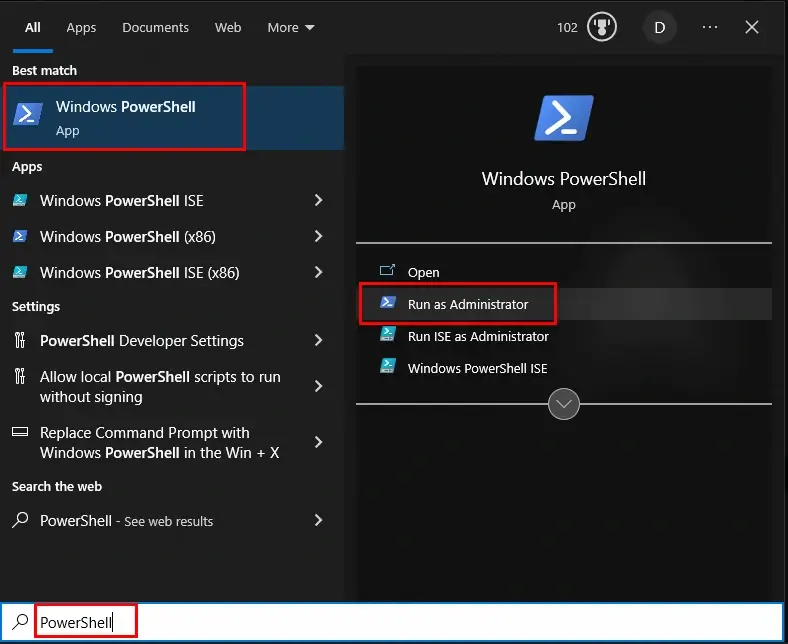
To install the latest version of Ubuntu by utilizing WSL, simply run “Windows PowerShell” as administrator:
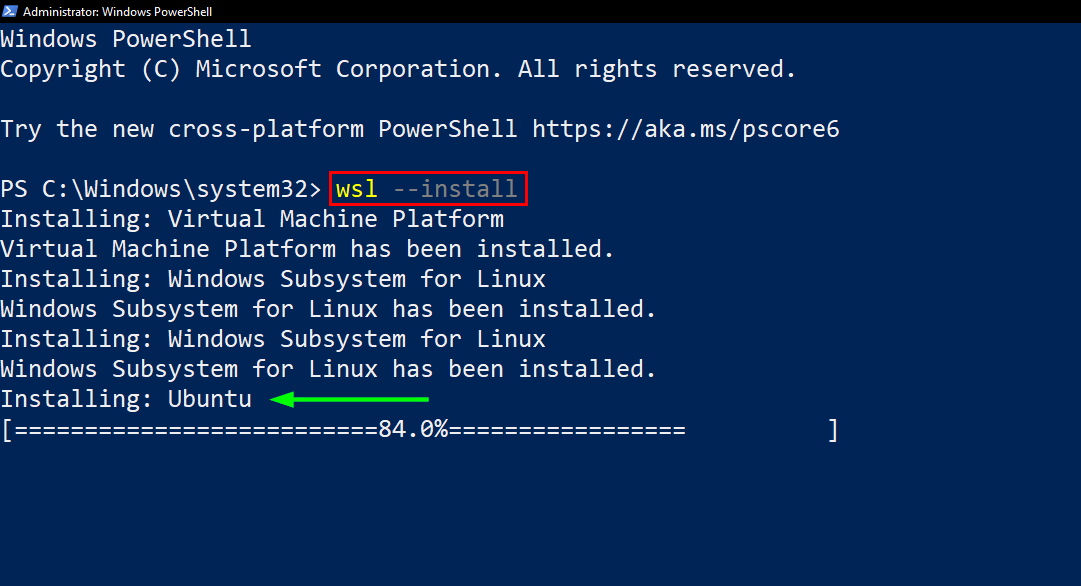
Then, type the command listed below to automatically install and set up WSL along with the default version of Ubuntu:
$ wsl --install
This command takes care of everything including turning on the required features of Windows, installing the WSL Linux kernel update package, and setting up Ubuntu.
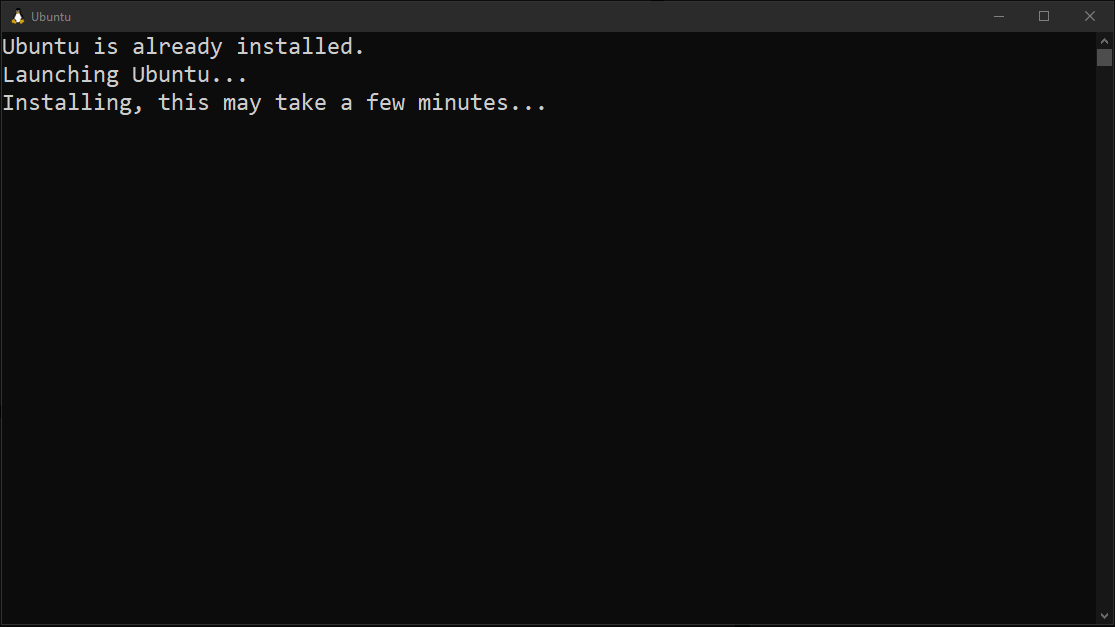
Once the installation process completes, reboot your Windows system to access Ubuntu. After the reboot, the further installation and launching process of Ubuntu will automatically start and will consume some time, so wait for its completion:
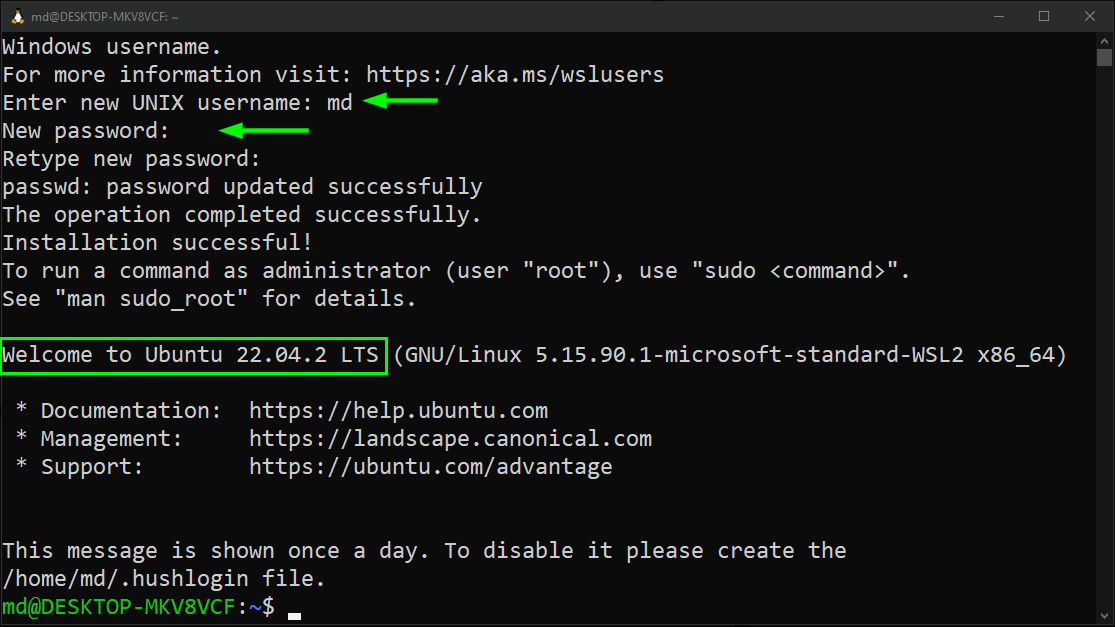
The next step is to provide the username for Ubuntu (22.04) and also set its password. After it, you will be able to execute Ubuntu commands:
Let’s try this by executing, the apt update command:
$ sudo apt update
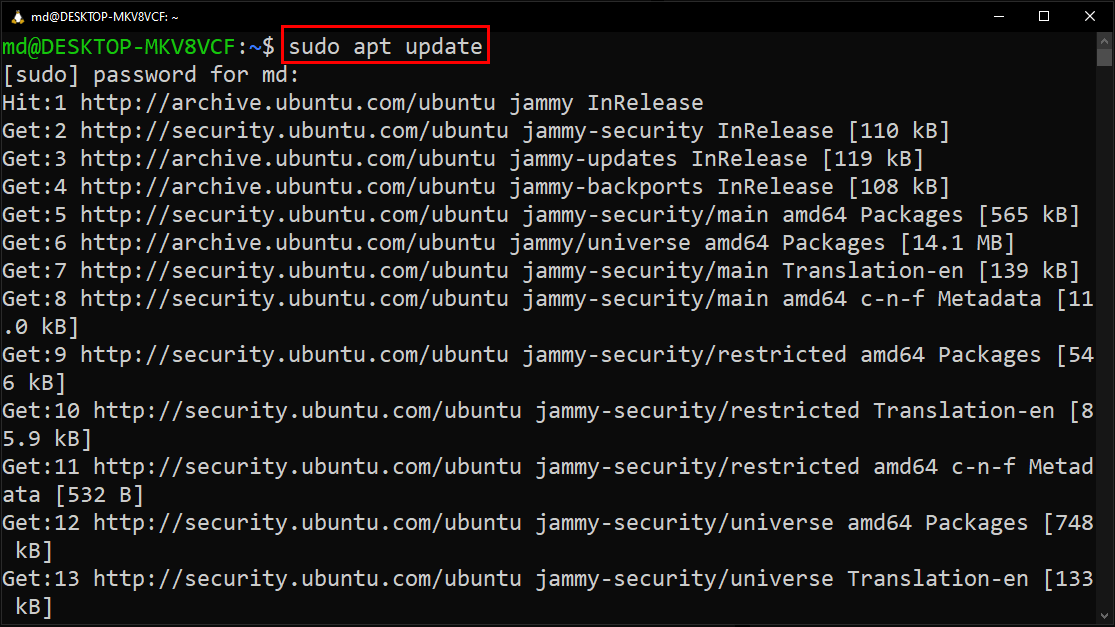
It is visible that your Ubuntu has started the process of updating the local repository cache.
Install Specific Ubuntu Version on Windows via WSL
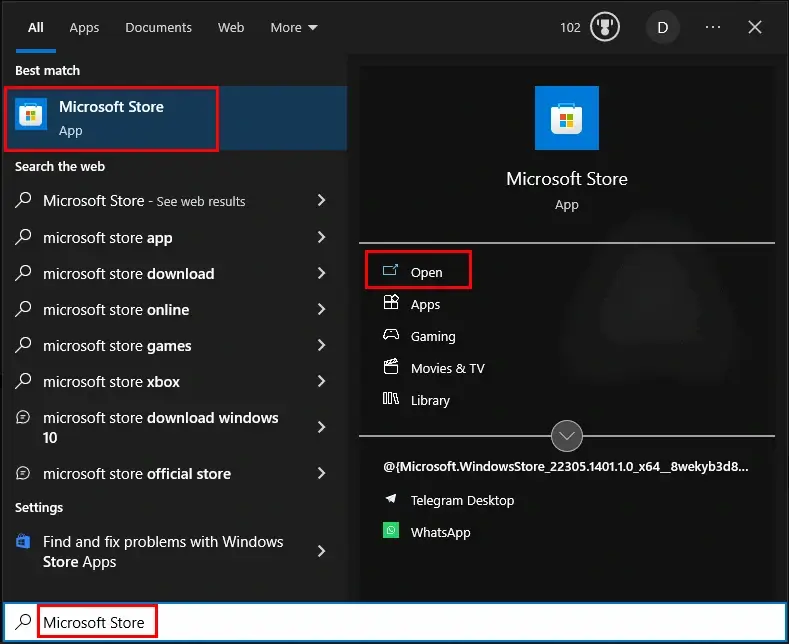
However, if you want to install a specific previous version of Ubuntu on Windows. Then, head to Microsoft Store after following the previous steps or simply enables the Windows Subsystem for Linux as shown in the “Enable WSL” section of this blog:
In the Microsoft store, search for the desired version of Ubuntu. For instance, let’s search “Ubuntu 18.04”:
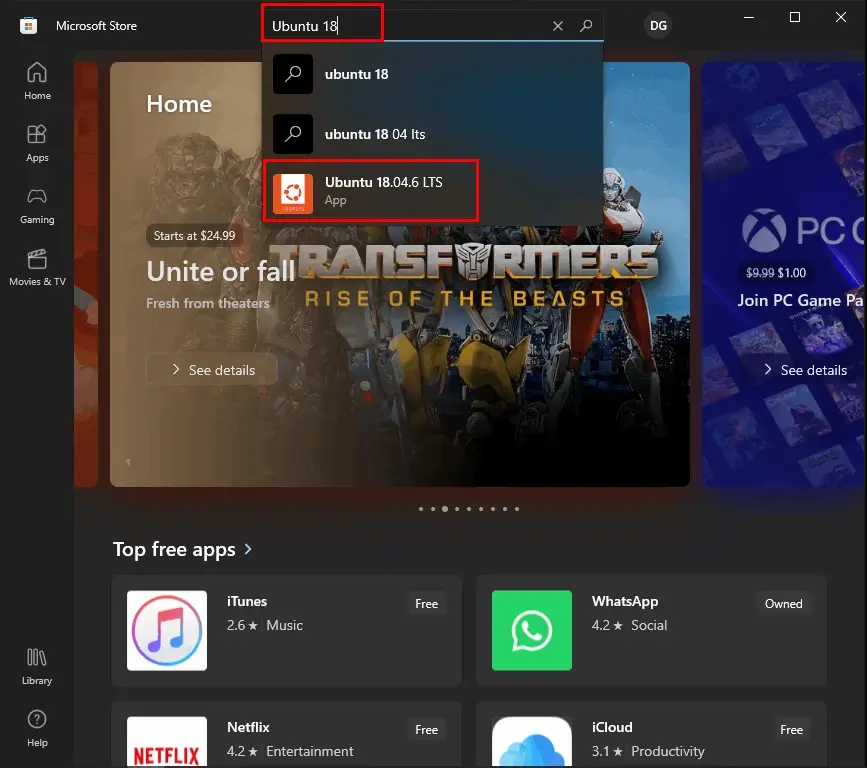
Then, click on the “Get” button and wait for the completion of the installation process:
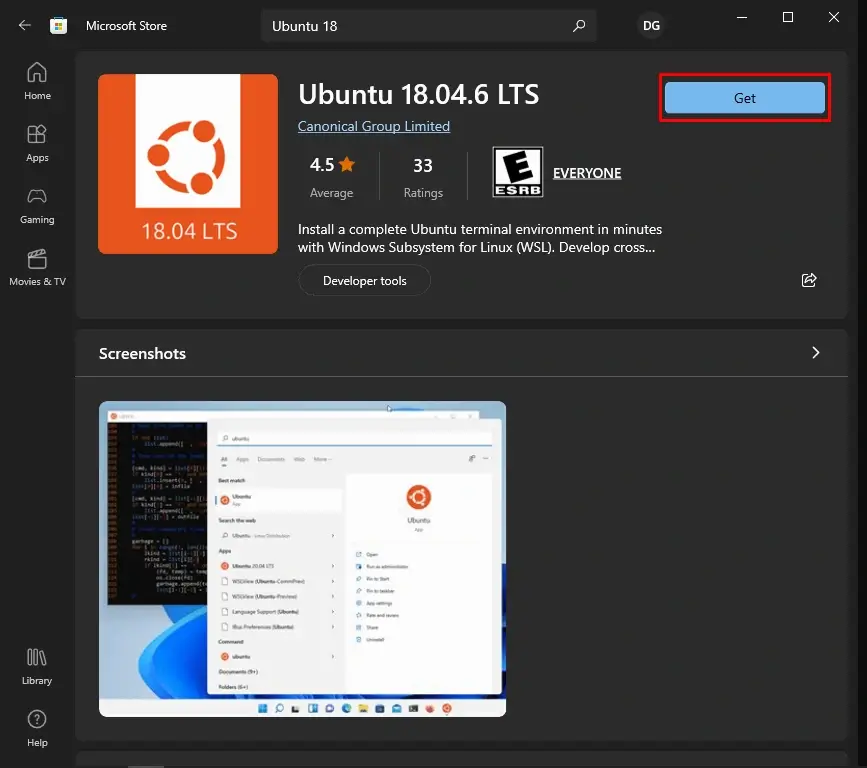
Once the Ubuntu is installed, click on the “Open” button:

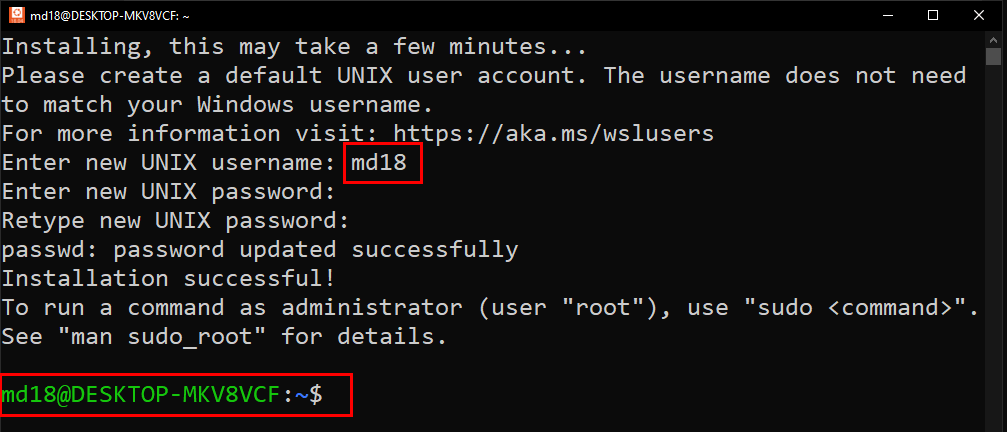
The Ubuntu 18.04 will launch successfully, now set its username and password:
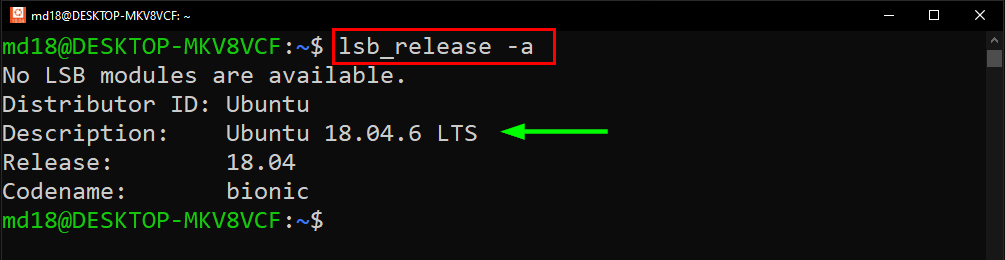
You can even check the version of installed Ubuntu by executing the command mentioned below:
$ lsb_release -a
Now close the terminal to shut down Ubuntu.
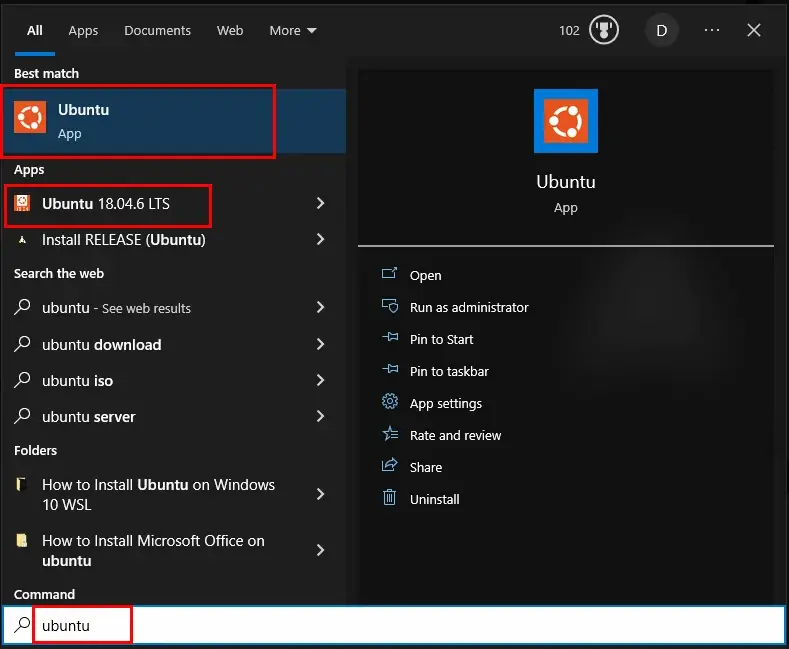
You can search Ubuntu to view and open your already installed Ubuntu from the Start Menu.
Conclusion
WSL (Windows Subsystem for Linux) is a feature offered by Microsoft that allows the user to run a Linux distribution alongside Windows 10. It supports many Linux distributions including Ubuntu, Fedora, and Debian.
This guide provided a solution for installing the latest/specific version of Ubuntu on Windows by using WSL.